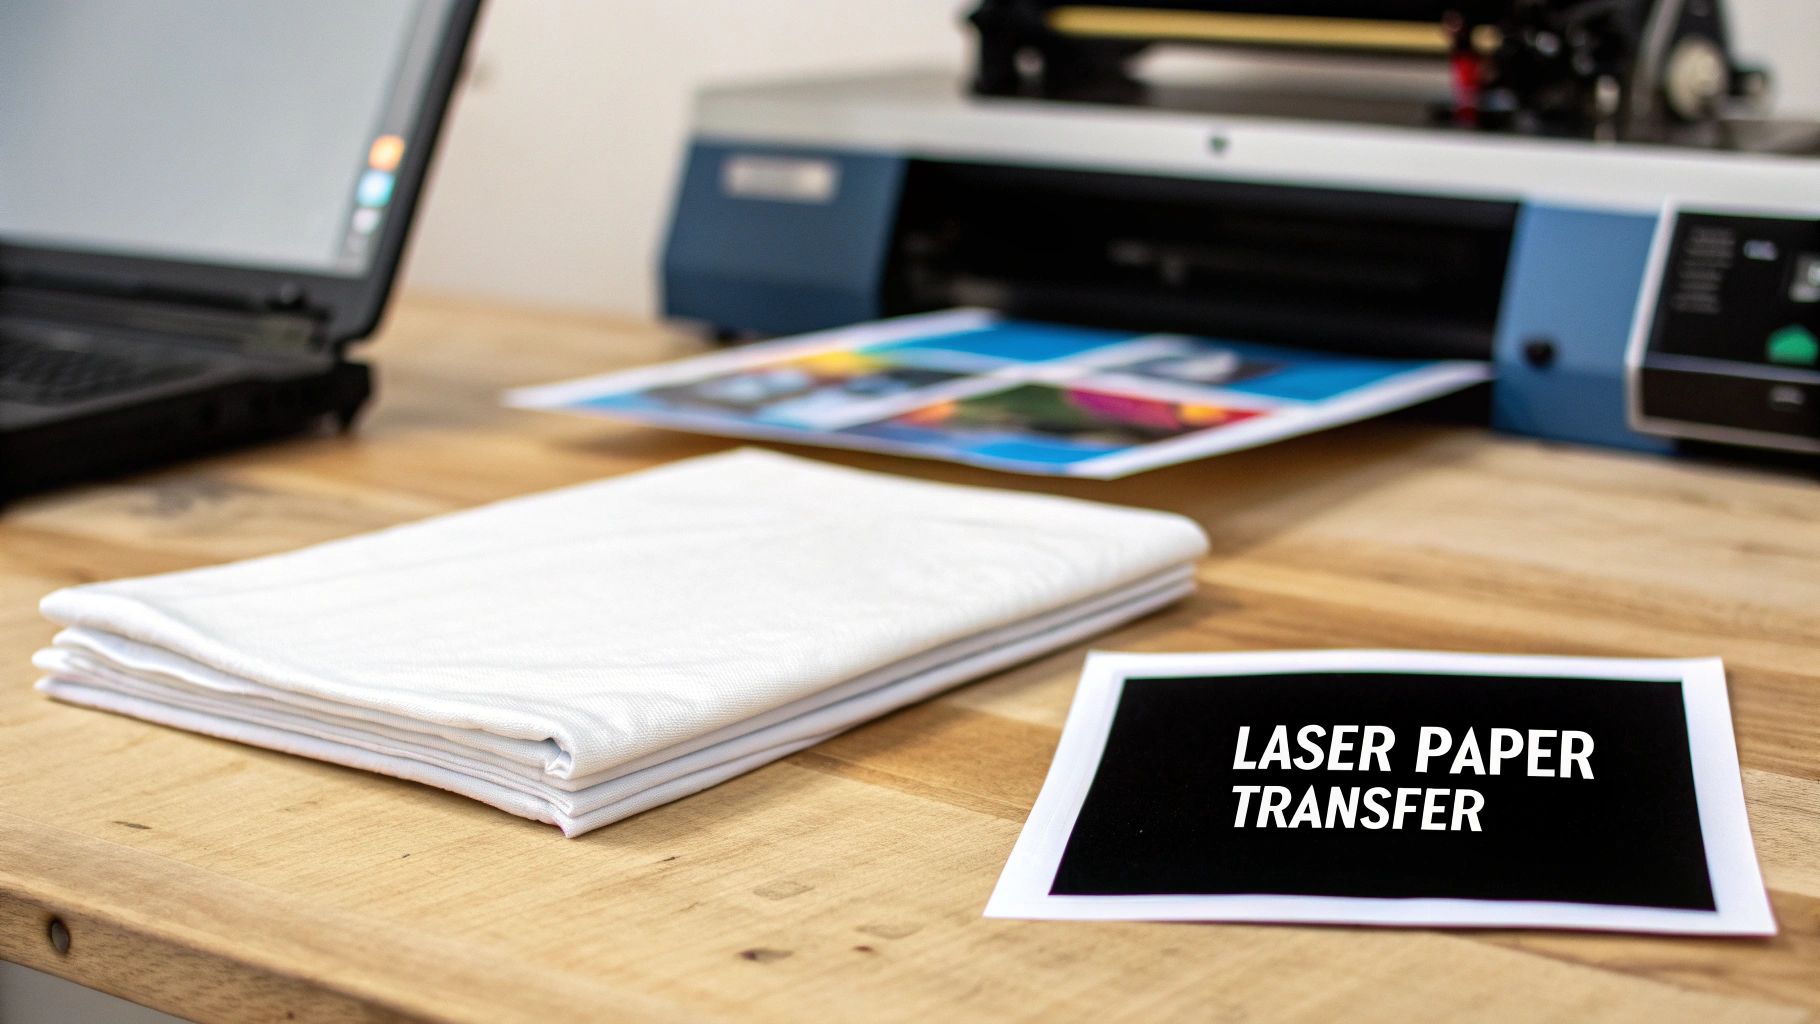
A Complete Guide to Laser Paper Transfer for Textiles
Welcome to the world of laser paper transfer, a fantastic technique for creating vibrant, personalized textiles. The basic idea is simple: you print a design onto special paper with a laser printer, then use a heat press to transfer that design onto your fabric. It’s an incredibly versatile method that opens up possibilities that other printing processes just can't touch.
Why Laser Paper Transfer Is a Game-Changer for Your Business
If you run a small print shop, sell on Etsy, or create custom gifts, you know the constant challenge is finding new ways to expand your product line and stand out. This is where laser paper transfer shines. It's a powerful decoration method that unlocks so much creative potential, especially if you've ever felt limited by what sublimation alone can do. As textile specialists, we’ve seen this technique completely transform businesses.
And this isn't just a niche trend. The global market for laser transfer paper is expected to reach an incredible $3.3 billion by 2033—a huge leap from where it stood in 2020. This growth is all about the high demand in apparel and gifting, where the precision and speed of this method are a perfect fit.
The Real-World Advantages for Creators
Unlike some printing methods that box you into using specific materials, laser transfer opens up a whole new world of fabrics. You can get stunning, full-color results on a massive variety of textiles, which gives you a serious competitive edge.
Here are the key reasons why so many professionals are turning to this technique:
- Absolutely No Weeding: This is a game-changer, especially for intricate designs. You just print what you want to transfer, completely skipping the painstaking process of weeding vinyl.
- Fabric Freedom: This is probably the biggest perk. You can press beautiful designs onto 100% cotton, polyester blends, and other fabrics that just don't work with sublimation.
- Vibrant Designs on Dark Colors: With the right paper and a white toner printer, you can finally create bright, opaque prints on black and other dark fabrics. That’s something traditional sublimation simply can't do.
Here at Spark Blank Textiles, we're all about providing high-quality blanks that act as the perfect canvas for your art. Techniques like laser transfer are what allow you to turn our carefully curated selection of blankets and towels into high-value, personalized products that your customers will love.
In this guide, we'll walk you through everything, step by step. We'll cover the tools you need, the full process, and share some insider tips for getting professional results on quality blanks like our plush sherpa throws. And while we're focused on laser transfer here, it's always good to know how different methods stack up. If you're curious about another popular technique, take a look at our guide on sublimation heat transfer processes.
Getting Your Gear in Order: Tools and Materials
Your success with laser paper transfer begins long before you power up the heat press. Getting your setup right with the proper equipment and supplies is the bedrock of creating professional-grade products. Think of it like a chef's kitchen—every single tool has a purpose, and using the right ones makes all the difference in the final dish.
So, let's walk through your essential checklist. We'll cover what you need, why it's so important, and how to make smart choices for your business.
Your Laser Printer: The Heart of the Operation
The printer is, without a doubt, the core of your laser transfer workflow. While you can get by with some standard office laser printers, a few key features will take your results from "pretty good" to truly exceptional. The single most important feature to look for? White toner capability.
A standard CMYK (Cyan, Magenta, Yellow, Black) laser printer does the job just fine for designs going onto white or very light-colored fabrics. But the moment you want to print on dark textiles, a printer with a dedicated white toner channel becomes absolutely essential. It lays down an opaque white base layer underneath your colors, making them pop with incredible vibrancy on any background. This one feature opens up a whole new world of product possibilities.
Decoding Laser Transfer Papers
The paper you use is every bit as critical as the printer itself. It's the carrier for your design, and different papers are engineered for very specific jobs. Getting a handle on the two main categories will help you match the right paper to every project that comes your way.
-
One-Step (No-Weed) Paper: This is your workhorse for white and light-colored fabrics. It's wonderfully straightforward: print your mirrored design and press it directly onto the garment. It gets the "no-weed" name because the transfer film only sticks where there's toner, which will save you an unbelievable amount of time on tedious weeding.
-
Two-Step (A/B Paper) System: This is the magic bullet for dark garments. The system uses two sheets: an "A" sheet that you print on, and a "B" sheet coated with an opaque adhesive. The first step involves pressing the two sheets together—a process we call "marrying"—which transfers that adhesive only to the parts of your design with toner. This is what creates that crucial white backing for brilliant colors on darks.
Choosing the right paper system is all about balancing efficiency and quality. For a big run of simple logos on white t-shirts, one-step paper is a lifesaver. But for a premium, high-contrast design on a black fleece blanket, the two-step process is the only way to get that stunning, professional look.
Before we move on, let's put all the essential equipment into a clear table so you can see exactly what you need and why it's so important.
Essential Equipment for Laser Paper Transfer
This table breaks down the necessary tools and the key features you should be looking for when setting up a professional workspace for textile transfers.
| Equipment | Key Feature to Look For | Why It Matters for Quality |
|---|---|---|
| Laser Printer | White Toner Capability | Essential for printing vibrant, opaque designs on dark-colored fabrics. |
| Heat Press | Even Pressure & Precise Temp Control | Guarantees the toner bonds permanently and evenly, preventing peeling or fading. |
| Transfer Paper | Application-Specific (One-Step vs. Two-Step) | Using the correct paper ensures proper adhesion and color vibrancy for the specific fabric color. |
| Quality Textiles | Smooth, Tight Weave (Polyester/Poly-Blends) | A high-quality surface allows for crisp, detailed transfers and enhances durability. |
| Heat Resistant Tape | High-Temp Adhesive | Secures your design in place, preventing "ghosting" or shifting during the press. |
| Teflon Sheet/Cover | Non-Stick Protective Layer | Protects your heat press platen from ink residue and prevents scorching the fabric. |
Having these pieces in place will not only make your production smoother but will dramatically improve the consistency and durability of your finished products.
The Heat Press: A Non-Negotiable Investment
A household iron can be tempting when you're just starting out, but for any serious business, a quality heat press is an absolute must-have. The reason boils down to two things you can't compromise on: even pressure and precise temperature control.
A heat press distributes that heat and pressure uniformly across every square inch of your design—something an iron just can't do. This consistency is what ensures the toner bonds permanently with the fabric's fibers. Inconsistent pressure leads to patchy transfers, and the wrong temperature can make a design peel right off after the first wash. Investing in a good clam-shell or swing-away press isn't just buying a tool; it's an investment in your product quality and your brand's reputation.
Choosing Your Canvas: The Right Textiles
Finally, the blank item you're printing on matters immensely. The fabric's texture, material composition, and weight all have a direct impact on the final look and feel of the transfer. While laser transfer is compatible with cotton, we've consistently found that the best, most vibrant results come from high-quality polyester or poly-blend fabrics.
For example, the 100% polyester face of our Sherpa Sublimation Throws (430 GSM) creates an incredibly smooth surface for the toner to grab onto, resulting in sharp lines and brilliant colors. That tight weave makes sure the design sits beautifully on the fabric, giving you a professional and durable finish that customers will love. When you pair the right laser paper technique with a premium blank, you create a product that truly stands out.
If you're in the process of setting up your workspace and exploring different decoration methods, you might find our overview of complete dye-sublimation kits to be a helpful point of comparison.
Your Laser Paper Transfer Workflow, Step-by-Step
This is where the real fun begins—turning that idea on your screen into a tangible product people will be excited to own. Getting from a digital design to a finished garment isn't just a list of tasks; it's a connected workflow. We'll walk through prepping your file, dialing in your printer, and then bringing it all together at the heat press.
Think of it as a simple three-station process.
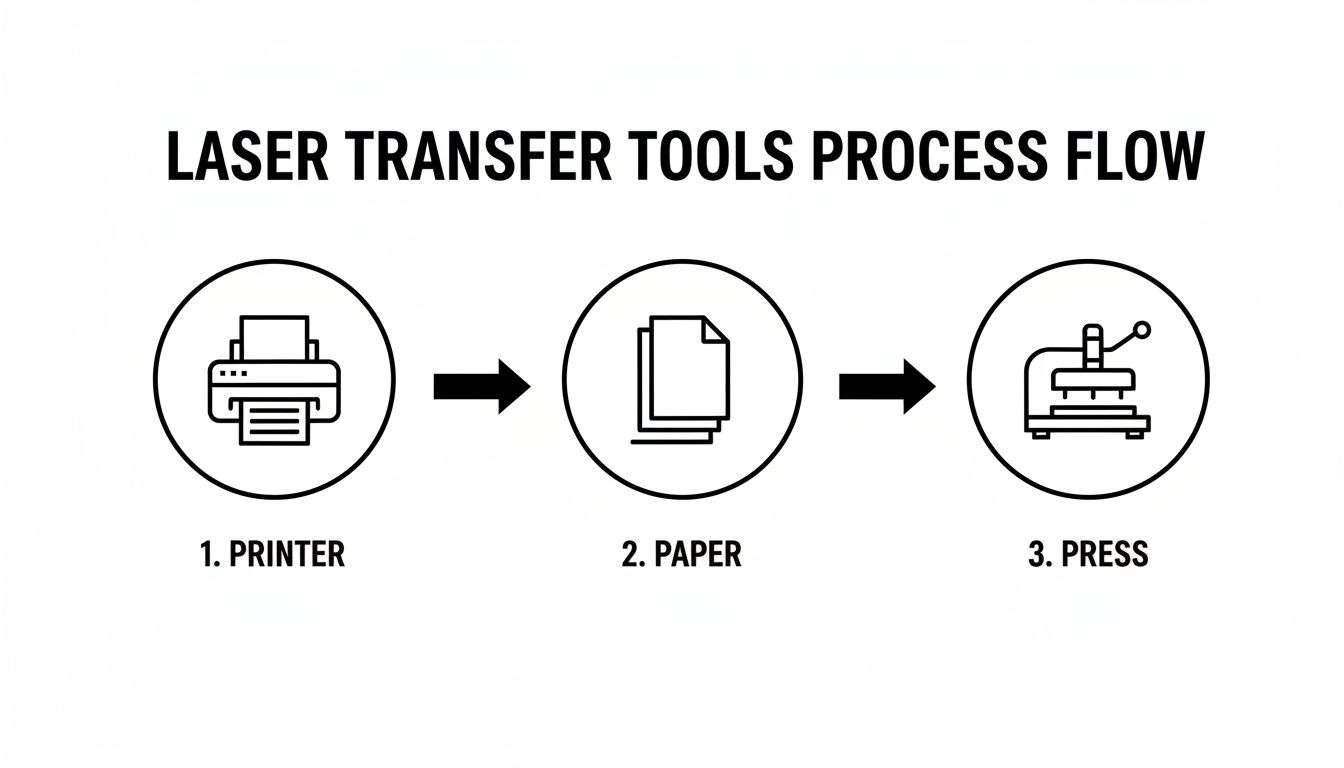
You've got your printer, your specialized paper, and your press. Each one is a crucial link in the chain, and getting each one right is key to a great final product.
Prepping Your Design for a Flawless Print
Before you even dream of hitting that print button, your digital file has to be spot-on. This is your foundation. Any little mistake here gets amplified in the final press, and that means wasted time and materials—something no small business can afford.
The absolute golden rule of laser transfer is to mirror your image. Seriously, make this a mental checklist item you never skip. The design is pressed face-down onto the fabric, so it needs to be flipped horizontally in your software. Forgetting this is probably the most common (and frustrating) mistake we see people make.
Beyond that crucial first step, here are a few other software tips we've learned over the years:
- Go High-Res or Go Home: Always start with a file that’s at least 300 DPI (dots per inch) at the size you intend to print it. A low-res image will look fuzzy and pixelated after transfer, instantly making your product look amateur.
- Stick with an RGB Color Profile: It might seem counterintuitive since printers use CMYK, but your life will be easier if you design in RGB. Most white toner printer RIPs (Raster Image Processing software) are optimized to take an RGB file and handle the complicated conversion to CMYK plus white toner themselves. This gives you the best shot at vibrant, accurate colors.
- Vectors are Your Best Friend: Whenever you can, work with vector graphics from programs like Adobe Illustrator or CorelDRAW. Vector files are magical because they can be scaled up or down to any size without a single drop in quality, guaranteeing sharp, clean lines every time.
Dialing In Your Printer Settings
Okay, your design is prepped and ready. Now it's time to talk to your printer. Don't just send the file using your default "plain paper" setting. That's a recipe for disaster, leading to poor toner coverage and colors that look washed out.
Think of your printer's settings menu as the cockpit for your transfer quality. You need to tell it precisely what you're printing on so it can lay down the right amount of toner at the right temperature.
Dig into your printer driver settings and find the paper type or media type option. You're looking for settings like "Heavy," "Cardstock," or "Label." Choosing one of these tells the printer to slow down and crank up the fuser heat, which is essential for getting the toner to stick properly to the slick coating on the laser paper transfer sheet.
While you're in there, look for a print quality or toner density setting. Crank that up to the highest possible option. You want a thick, rich layer of toner on that paper to get those bold, punchy colors on your final product.
The Art of the Heat Press
The heat press is where it all comes together. This is where your design permanently bonds with the fabric. Success here boils down to a simple formula of three key variables: time, temperature, and pressure. But finding the perfect combination isn't a one-size-fits-all deal; it changes with every type of transfer paper and every different fabric.
As a general rule of thumb, most laser papers work somewhere in the 280-350°F (138-177°C) range, with press times between 15 and 30 seconds. But always, always start with the manufacturer's instructions for your specific paper. We highly recommend keeping a logbook right next to your press. Jot down the settings you use for different paper and fabric combos—it will quickly become your most valuable tool.
For instance, pressing a design onto one of our plush Sherpa Sublimation Throws is a totally different ballgame than pressing onto a thin t-shirt. The thick, fluffy texture of sherpa needs firm pressure to push the design deep into the fibers, while that same pressure could leave a permanent, ugly press box on a more delicate fabric.
The "Marrying" Step for Two-Step Papers
If you're working with dark or colored garments, you're almost certainly using a two-step (often called an A/B) paper system. This introduces an extra but absolutely vital step known as "marrying."
Here's how it works: after printing on the 'A' sheet, you lay the 'B' sheet (the one with the white adhesive coating) on top. You then press them together in your heat press for a short time. This process melts the white adhesive from the 'B' sheet onto only the parts of the 'A' sheet that have toner. When you peel them apart, you’re left with a perfectly backed transfer, ready for the main event.
Pro Tip: When you're marrying your A and B sheets, we find it's best to use a slightly lower temperature and shorter press time than you'll use for the final press on the shirt. This makes sure the adhesive transfers cleanly without fully curing, which sets you up for a much smoother final transfer.
Hot Peel vs. Cold Peel: The Grand Finale
You've pressed the design onto the textile. You're almost there! The last move is to remove the paper carrier sheet, and how you do this is a big deal. Your paper will be either a "hot peel" or a "cold peel," and getting this wrong can ruin an otherwise perfect transfer.
-
Hot Peel: This means what it sounds like. You have to peel that paper backing off immediately after the press opens, while everything is still scorching hot. Hot peels tend to leave a softer, more matte finish because the design melts a bit more into the fabric fibers. You need to be fast and smooth—peel in one fluid motion. No hesitation!
-
Cold Peel: This one requires a bit of patience. You have to let the garment and transfer cool down completely to room temperature before you even think about touching that paper. A cold peel usually gives you a glossier, more vibrant result because the entire layer of toner hardens on the fabric surface before the backing is removed. If you get impatient and peel too soon, you’ll be left with a flaky, ruined mess.
Nailing this entire workflow takes a bit of practice, but if you're methodical and pay attention to every stage—from the digital file to that final peel—you'll be cranking out professional-grade products that show off the quality and care you put into your work.
Getting Pro-Level Results on Spark Blank Textiles
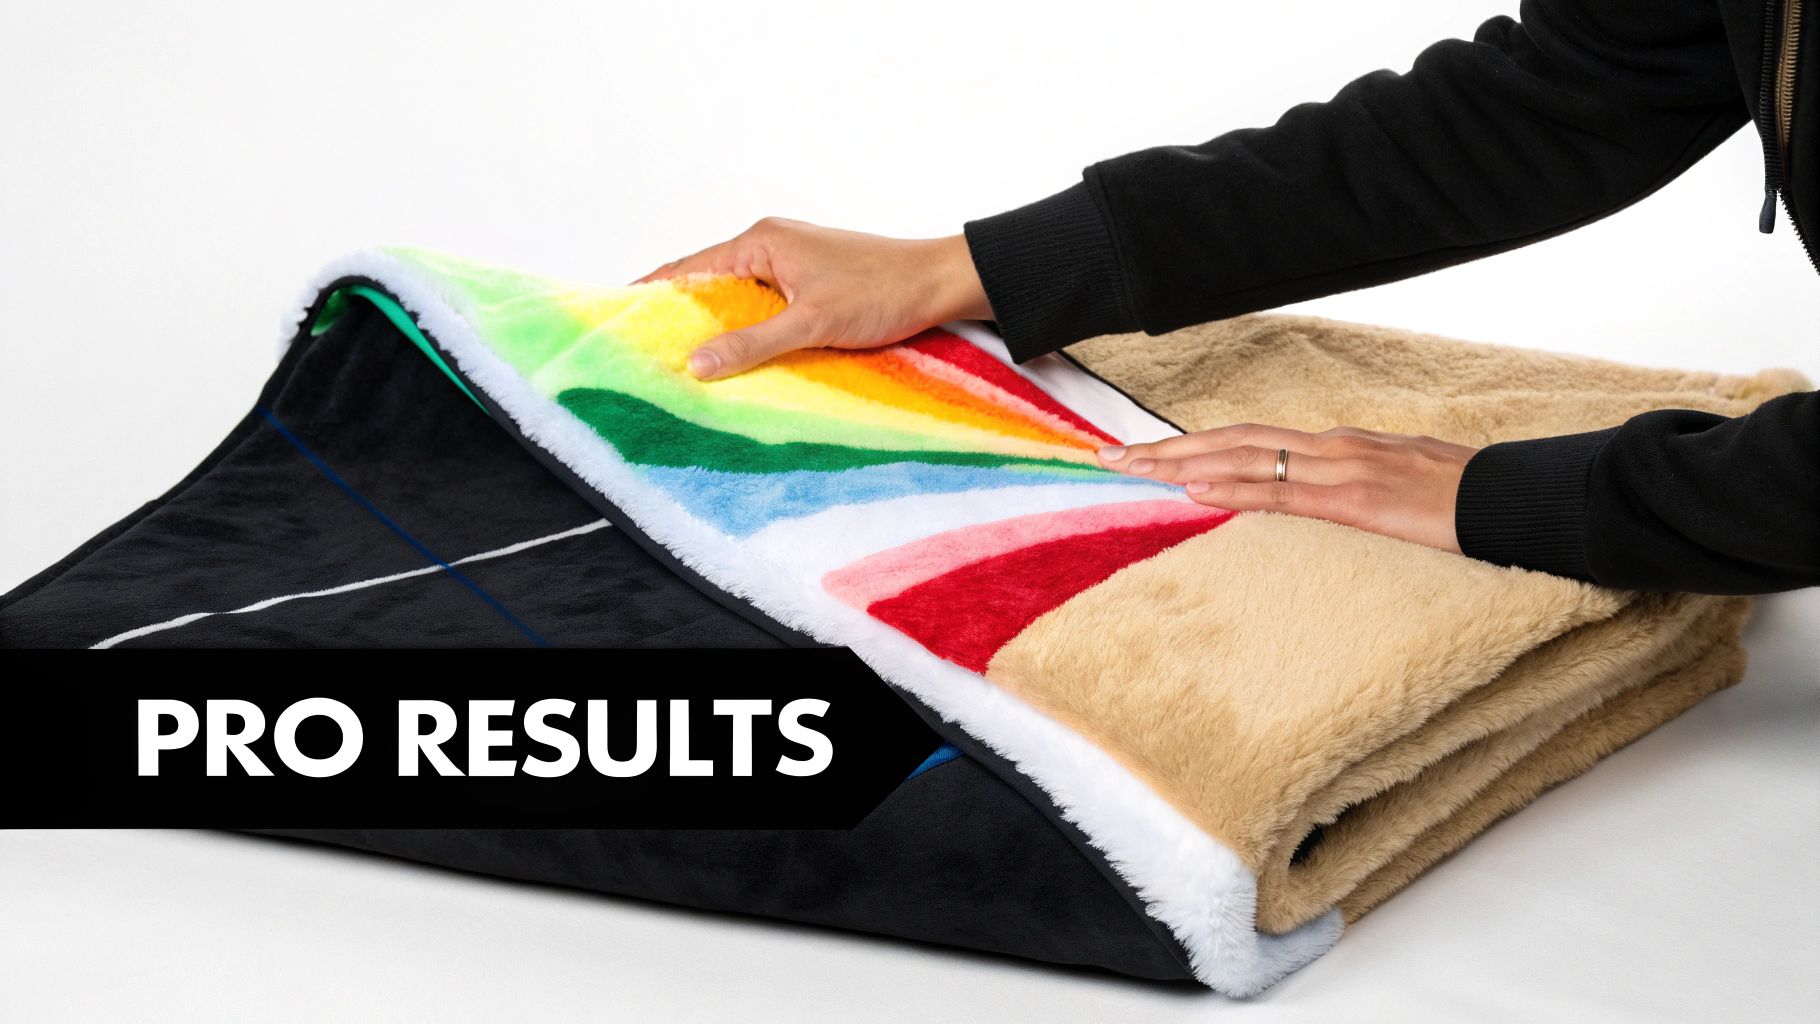
This is where the rubber meets the road. General guidelines are one thing, but getting exceptional, repeatable results means knowing exactly how your materials work together. We've spent countless hours in our own shop, testing and tweaking, to figure out what makes our Spark Blank Textiles products truly pop with laser paper transfers.
Premium textiles just behave differently. The specific weave, fabric weight, and texture of each blank are going to interact with the transfer paper in their own unique way. A setting that gives you a perfect print on a lightweight fleece might leave you with a disappointing result on a thick, woven tapestry. It's all about dialing in your approach.
Heat Press Recipes for Our Signature Blanks
Consider these your starting "recipes" for success. Since every heat press has its own quirks, we always suggest running a small test swatch first. But these settings will get you right in the sweet spot for our most popular items.
Getting this right is more important than ever. Laser transfer printing now makes up a whopping 42.60% revenue share in the overall transfer paper market, and a big reason is its fantastic performance on natural and elastic fibers. This makes it a perfect match for our high-GSM textiles, like the heavy-duty 410 GSM outdoor picnic blankets or our plush sherpa throws. The technology has also helped bring short-run production costs down by 20-30%, letting small businesses like yours create vibrant, one-off designs without killing your margins.
Here are the specific settings we recommend to get you started.
Heat Press Settings for Spark Blank Textiles
Every fabric has its sweet spot. Below are our tried-and-true starting points for applying laser transfer paper to our signature products. Remember to test first, as your press may vary slightly.
| Product | Recommended Temperature | Press Time | Pressure Setting | Pro Tip |
|---|---|---|---|---|
| Sherpa Sublimation Throws | 350-375°F | 25-30 seconds | Medium | Use a pressing pillow to avoid press lines on the deep pile. |
| 300 GSM Fleece Throws | 360-380°F | 20-25 seconds | Medium | This is the ideal pressure to get vibrant color without crushing the fleece. |
| Custom Woven Tapestry Blankets | 375-395°F | 30-35 seconds | Firm | The firm pressure helps the toner get into the fabric's texture for full coverage. |
| Outdoor Picnic Blankets | 380-400°F | 35-40 seconds | Firm | The higher heat and firm pressure ensure a durable bond on this robust fabric. |
These settings are your launchpad. From here, you can make small adjustments to perfectly match your equipment and achieve that flawless finish every single time.
Tips for Nailing Different Textures
Working with different surfaces is half the fun. A smooth fleece is pretty straightforward, but what about a deep-pile sherpa or a textured woven throw? Here’s how we handle them in our own shop.
- Sherpa Throws: That super-soft, plush feel is what makes our Sherpa Sublimation Throws a bestseller, but it's also prone to showing the dreaded "press box" outline. To completely avoid this, we always slide a heat-resistant foam pillow or a pressing pad inside the blanket. It allows the fabric to compress gently without creating those sharp, unwanted lines.
- Woven Tapestry: Our Custom Woven Tapestry Blankets have a gorgeous, tactile surface. For your transfer to look right, it needs to make full contact with both the peaks and valleys of that weave. A slightly longer press time paired with firm pressure is the key here. This pushes the toner deep into the fibers for a complete, lasting image that feels like part of the fabric.
- Fleece Throws: With our 300 GSM Fleece Throws, the name of the game is color vibrancy. A solid medium pressure is perfect. If you go too light, the transfer can look washed out. Go too firm, and you risk flattening and crushing that soft fleece texture everyone loves.
One of the most common mistakes we see is people using the exact same pressure for every single product. Just remember: pressure controls how the toner physically meets the fabric. For plush items like sherpa, let the heat do the heavy lifting with medium pressure. For textured items like a tapestry, you need firm pressure to ensure every bit of the design adheres.
When you tailor your approach to the specific textile, you stop just applying a design and start integrating it with the product. That small shift in mindset is what separates good work from truly great work. It's the kind of detail that turns a first-time buyer into a long-term customer.
You can apply these same principles to other items in our collection, too, like when you're working on our fantastic blank towels for printing.
Finishing and Aftercare: The Secret to a Long-Lasting Transfer
Getting a bright, beautiful transfer onto a garment is only half the battle. If you want customers to rave about your products and come back for more, that design needs to last. This is where the finishing touches and proper aftercare instructions come in—they’re what separate a professional-grade product from something that cracks and fades after a few trips through the laundry.
The single most important thing you can do after pressing is what’s called a finishing press. Once you’ve peeled away the transfer paper, lay a sheet of parchment paper, a silicone finishing sheet, or a T.Seal sheet over the design. Now, press it again for just 5-10 seconds. This quick step works wonders: it embeds the toner deeper into the fabric for a huge boost in durability and softens the feel of the design, so it feels less like a plastic sticker.
Your Guide to the Final Press
Don't skip this final press. Seriously. It’s a small detail that makes a world of difference in the final product's feel and how well it holds up over time.
- Parchment Paper: This is our go-to for a matte, natural look. It’s perfect for locking the design into the fibers of cotton or fleece.
- Silicone Finishing Sheet: If you want a bit more pop, a silicone sheet will give the design a slightly glossy finish that can make colors look even more vibrant.
- T.Seal Paper: This is a specialty sheet designed to give your transfer a soft, screen-printed feel while maximizing durability.
We always tell people to think of this final press as "curing" the design. It’s like the clear coat on a car's paint job—it seals everything in and protects it from the elements, ensuring it looks amazing for the long haul.
Setting Your Customers Up for Success with Aftercare Instructions
Clear, simple washing instructions aren't just good customer service; they protect the quality of your work long after it leaves your hands. A well-cared-for laser transfer can easily last 30-50 washes without major fading. Tucking a small care card into each order is a pro move that helps your customers keep their new favorite item looking great.
Here’s what we recommend telling your clients to keep their laser transfer products in top shape:
-
Wait 24 Hours Before Washing: The toner needs time to fully cure and bond with the fabric. Always tell them to wait a full day before that first wash.
-
Wash Inside-Out in Cold Water: This is the golden rule. Turning the garment inside-out protects the design from rubbing against other clothes, and cold water prevents the toner's bond from weakening.
-
Use a Mild Detergent: Harsh chemicals, bleach, and even some fabric softeners can break down the transfer over time. A simple, gentle detergent is always the best choice.
-
Tumble Dry on Low or Hang to Dry: High heat is the number one enemy of decorated apparel. Tumble drying on the lowest setting is okay, but hanging it to air dry is even better for maximizing the design's life.
-
Never Iron Directly on the Design: If they need to iron the item, they should turn it inside-out, use a low heat setting, and be careful to avoid the printed area.
Getting Ahead of Common Transfer Problems
Even seasoned pros run into issues now and then. A perfect transfer is a delicate dance between heat, pressure, and time, and even a small misstep can throw things off. But don't sweat it—most of the common headaches with laser paper transfers are pretty simple to solve once you know what you’re looking for.
Think of this as your field guide for diagnosing and fixing those frustrating little problems. We'll get you back on track and turning out flawless custom gear in no time.
Patchy or Incomplete Transfers
This is probably the most frequent issue people run into. You peel back the paper, and bits of your design are missing, or the whole thing looks faded and splotchy. When this happens, it almost always comes down to a problem with either pressure or heat.
More often than not, the culprit is uneven pressure. Your heat press needs to make solid, uniform contact across every single inch of the design. This gets tricky with things that aren't perfectly flat, like our super-plush Sherpa Sublimation Throws or garments with thick seams. If the platen isn't pressing down firmly everywhere, some spots just won't get the force they need for the toner to bond properly.
Here’s what to do:
- Crank up the pressure. Seriously, this is the first thing you should try. A quick adjustment to a firmer setting often solves the problem instantly.
- Grab a pressing pillow. For anything thick, textured, or seamed, a heat-resistant foam pillow is your best friend. It slides under the garment and helps even out the surface, ensuring the press can apply pressure everywhere.
- Double-check your heat. A press that's running too cool won't melt the toner correctly. Make sure your press is actually reaching the recommended temperature for the specific paper you're using.
Designs Cracking or Peeling After a Wash
It’s a gut-wrenching moment: a customer tells you their brand-new design is cracking and peeling after just one trip through the laundry. This is a dead giveaway that the toner never truly fused with the fabric. It might have looked perfect coming off the press, but the bond was just sitting on the surface.
A design that fails in the wash is almost always caused by not enough heat or time during the press. This is exactly why we always emphasize that final 'fixing' press—that extra 5-10 seconds with parchment paper makes a world of difference for durability.
If you’re running into washability issues, it's time to revisit your settings. Try bumping up the temperature by 10°F or adding an extra 5-10 seconds to your press time. This gives the toner more time and energy to permanently lock into the fabric fibers, so it can easily stand up to a washing machine.
Unwanted Toner Specks or a 'Halo' Around the Design
Ever notice a faint box or a "halo" from the paper's coating around your design? Or maybe you’re seeing tiny, unwanted toner specks? This is a classic sign that something is off with your printer settings.
A faint halo is common with one-step (no-weed) papers when the toner isn't dense enough for a clean release. Dive into your printer settings and make sure you've selected a "heavy" or "label" media type. This tells the printer to lay down a much richer layer of toner.
If you’re seeing stray toner smudges, it might mean your printer's fuser isn't getting hot enough for the specialty paper. The fix is the same: changing the paper type in your print driver to a heavier option tells the printer to crank up the fuser heat. This ensures the toner is properly melted onto the paper before it ever gets to your heat press.
Got Questions About Laser Paper Transfer? We've Got Answers.
Even when you've got your process down, questions are bound to pop up. It's just part of mastering a new craft. Having worked with countless small business owners and makers, we've heard just about everything.
Let's dive into a few of the most common questions we get about getting started with laser paper transfers.
Can I Really Use This on Dark Fabrics or 100% Cotton?
Yes, you absolutely can—and honestly, this is one of the biggest wins for laser transfer over sublimation.
If you want to print on dark fabrics, the key is using a laser printer that has white toner. You'll also need a two-step paper system, often called "A/B" paper. This clever process first puts down an opaque white base only where your design is, which makes your colors vibrant and true on any color garment.
And for all the cotton lovers out there, you're in luck. Most professional-grade laser transfer papers are specifically formulated to work beautifully on 100% cotton, opening up a huge range of products you can offer.
What's the Deal with One-Step vs. Two-Step Paper?
The paper you grab really comes down to the color of the fabric you're working with. It's that simple.
- One-Step Paper: Think of this as your go-to for white or light-colored apparel. It's often called "no-weed" paper because you just print your mirrored design and press it right onto the shirt. Quick and easy.
- Two-Step Paper: This is your non-negotiable for dark garments. It's a system with an "A" sheet that you print on and a "B" sheet that carries the adhesive. You press these two together first, which cleverly applies a white adhesive layer only to your printed design. Then, you transfer that to your textile.
How Does It Feel and How Long Does It Last?
Let's talk about the "hand," or the feel of the finished print. A laser transfer will have a bit more substance to it than sublimation, which has virtually no feel at all. But don't let that worry you—today's papers are incredibly thin and soften up beautifully after the first wash, making them feel much more integrated with the fabric.
When it comes to durability, you'll be pleasantly surprised.
A quality laser paper transfer, when applied correctly and cared for properly, can easily withstand 30-50 washes before you see any significant fading or cracking. While a traditional screen print might win for sheer toughness on massive orders, laser transfer is the champion for detailed, full-color photos and complex graphics without all the messy setup.
Ready to turn those creative visions into tangible, high-quality products? The right blank is where it all begins. Check out our hand-picked collection of print-ready blankets, towels, and more at Spark Blank Textiles. Shop our premium blanks today!


