Your Guide to the Best T-Shirt Printing Machine Starter Kit
A t-shirt printing machine starter kit brings everything together—printer, heat press, and the essentials to get you started. But the real key to success lies in choosing the printing method that aligns with your business goals, budget, and the products you dream of creating.
Choosing The Right Printing Method For Your Business
Jumping into the world of custom printing is both exciting and a little daunting. The market is definitely growing: the custom t-shirt sector recently grew from USD 7.01 billion to USD 7.80 billion, with projections to reach USD 20.05 billion. But with more opportunity comes the need for smarter decisions.
The printing method you choose will define everything from material compatibility and production speed to your pricing structure and the types of orders you can successfully fulfill. To help you find the right path, let's break down the four primary methods.
Printing Method Comparison for Small Businesses
Here’s a clear comparison of the four main t-shirt printing methods to help you select the best starter kit for your business needs.
| Method | Best For | Startup Cost | Material Compatibility | Ideal Batch Size |
|---|---|---|---|---|
| Sublimation | Full-color athletic and polyester gear | USD 1,500–3,000 | 100% polyester | Small to Medium |
| Heat Press Transfers (DTF/Vinyl) | Custom, on-demand designs | USD 500–1,500 | Cotton, Polyester, Blends | Small |
| Direct-to-Garment (DTG) | Multicolor cotton tees | USD 10,000–20,000 | Cotton, Light Blends | One-offs & Small |
| Screen Printing | Bulk runs of the same design | USD 1,000–3,000 per color | Cotton, Blends, Polyester | Large |
Use this table as a starting point to focus on the method that best matches your expected order volume and fabric choices.
Understanding The Core Technologies
Each printing method offers unique advantages. Think of them as different tools in a workshop—some are for fine, detailed work, while others are built for heavy-duty production.
-
Sublimation. The top choice for vibrant, all-over designs on polyester fabrics. The ink turns to gas and fuses directly into the fibers, resulting in a print with zero texture. It’s perfect for performance apparel, custom blankets, and seamless patterns. To learn more, check out our guide to dye-sublimation kits.
-
Heat Press Transfers (DTF/Vinyl). An accessible and versatile entry point. You print or cut a design onto a special film or vinyl, then use a heat press to apply it. This method works well on cotton, polyester, and blends of nearly any color.
-
Direct-to-Garment (DTG). This is like an inkjet printer designed specifically for apparel. It sprays water-based inks directly onto cotton fabric, excelling at complex, multi-color artwork with a soft feel. It’s ideal for one-off custom orders and small runs.
-
Screen Printing. The go-to method for high-volume orders. Ink is pressed through a stenciled screen onto the fabric. While setup is more involved, the cost per item becomes very low at large quantities.
Aligning your printing method with your intended products and order sizes is the first step toward building a smooth, profitable workflow.
With this foundational knowledge, you're better equipped to choose the right equipment, streamline your printing process, and build a strong foundation for your business.
What's Really Inside a T-Shirt Printing Machine Starter Kit
The term "starter kit" can sometimes be misleading. It might suggest a single box with every last thing you need. In reality, a proper t-shirt printing machine starter kit is an assembly of crucial components you'll either purchase in a bundle or source individually. Getting this initial setup right is the difference between a smooth launch and early frustration.
While the printer often gets the spotlight, the true workhorse of any print shop is the heat press. We’ve seen many new business owners try to save money on a cheap press, and it almost always leads to poor results. Inconsistent heat from a flimsy platen causes blotchy, faded prints that result in unhappy customers and refund requests. A high-quality press that provides even, consistent temperature is non-negotiable; it's the bedrock of a professional-grade product.
The Core Components You Can't Skip
Consider this your essential equipment list. Without these key items, your printing operations will struggle to get off the ground.
- A Quality Heat Press: We can't say it enough—don't cut corners here. Look for a model with a clear digital display for both temperature and time. Pay close attention to the platen size; a standard 15"x15" is a great starting point for tees, but you’ll want a larger press for items like our premium sublimation blankets. It's also vital to have a stable surface for your machine. That’s why we created a guide to choosing the right heat press stands for your workshop.
- Specialized Inks: The printing method you select will determine the type of ink you need. Sublimation requires sublimation ink, DTF uses its own unique formula, and so on. Never mix them. Using the wrong ink can quickly lead to clogged print heads and a pile of ruined garments.
- Transfer Media: This is the material that carries your design from the printer to the product. For sublimation, you'll use specialized sublimation paper. For other heat transfer methods, you'll be working with DTF film or heat transfer vinyl (HTV).
Key Takeaway: The quality of your heat press has a direct impact on the quality of your finished products. Consistent heat and accurate pressure are essential for creating the vibrant, durable designs that build a great reputation.
The Small Consumables That Make a Big Difference
It's often the small, inexpensive supplies that elevate a print from amateur to professional. These items are your secret weapons for preventing common mistakes and protecting your valuable equipment.
You will absolutely need heat-resistant tape to secure your transfer paper, preventing the "ghosting" effect that causes blurry edges. A Teflon sheet or a roll of parchment paper is also essential. It acts as a protective barrier between your garment and the hot platen, preventing any ink bleed from scorching your press.
These consumables are low-cost but crucial for a clean and efficient workflow. This accessibility is a key reason the digital textile printing equipment market has grown to USD 334 million. Most quality starter kits, which typically range from $2,000 to $10,000, will include these core components. Learn more about the digital textile printing equipment market.
Your First Print From Unboxing to Success
The boxes have arrived, and the equipment is ready. Now it's time to turn that new hardware into a perfectly finished product. Going from an unboxed t-shirt printing machine starter kit to your first successful print is a straightforward process when you break it down into manageable steps.
Let's walk through that first print together.
The entire process is a simple, repeatable workflow where your printer, heat press, and supplies all work in harmony.
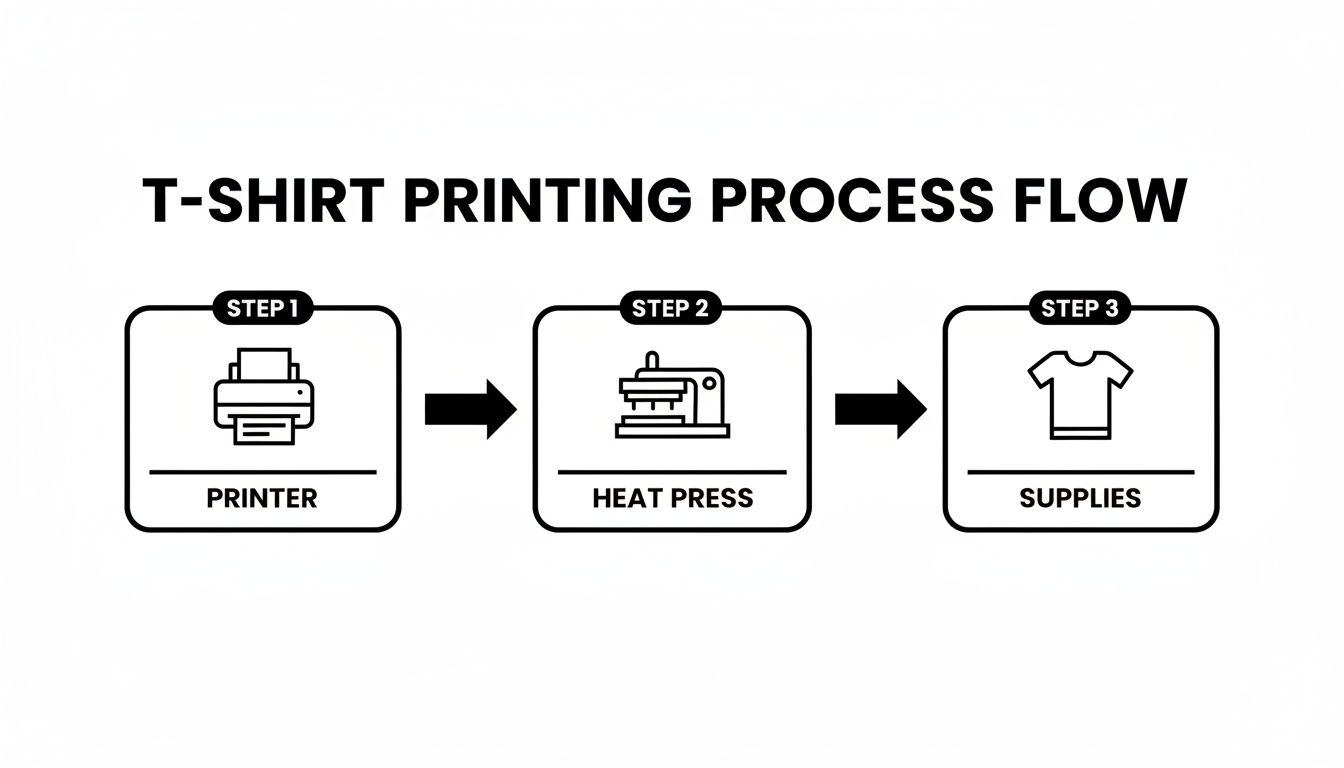
As you can see, a great print isn't the result of one action but a chain of well-executed steps. Each stage directly impacts the next.
Calibrating Your Equipment
Before any ink hits the paper, you must properly set up and calibrate your new machines. This is a non-negotiable first step.
Turn on your heat press and allow it to reach your target temperature. Watch the display to ensure it holds steady without significant fluctuations. At the same time, perform a nozzle check on your printer. This simple test confirms that all colors are firing correctly. Catching a clogged nozzle now saves significant time, frustration, and wasted materials later.
Think of calibration as a pre-flight check for your business. It ensures your tools are ready to perform, preventing costly errors. A few minutes of prep here can save hours of troubleshooting.
Preparing Your Artwork and Substrate
Your digital file is just as important as your physical equipment. Ensure your design is saved in a high-resolution format—300 DPI is the industry standard. A clean PNG, PDF, or EPS file is essential for avoiding a blurry or pixelated final print.
With your file ready, it's time to prepare the blank garment. Here’s our go-to checklist for every print:
- Lint Roll Thoroughly: We can't stress this enough. Even a tiny speck of dust or a stray fiber can create a noticeable white void in a sublimation print where the ink couldn't bond.
- Pre-press for 5-10 Seconds: This is a critical step. It removes any hidden moisture from the fabric and creates a smooth, flat surface for a perfect transfer.
- Position Your Transfer: Place your printed design face down on the garment. We always recommend using a few small pieces of heat-resistant tape to secure the corners so it cannot shift when you close the press.
Real-World Example: Sublimating a Fleece Throw
Let's apply these steps to a practical project. We'll sublimate a vibrant, full-color design onto a Spark Blank Textiles polyester fleece throw. Our throws are made from 100% polyester, making them an ideal canvas for a brilliant sublimation print.
First, I'll set my heat press to 400°F (204°C) and the timer to 60 seconds, using medium pressure.
After a thorough lint-rolling and a quick pre-press of the fleece, I'll carefully place the printed transfer paper exactly where I want the design. I'll cover it with a protective sheet (parchment paper is perfect) before closing the press. As soon as the timer signals, I'll open the press and peel the paper away in one smooth, confident motion. What remains is a stunning, permanent design that's infused directly into the fleece fibers.
For a deeper dive into getting this part perfect, check out our guide on selecting the right heat transfer printer paper.
This methodical approach—calibrate, prep, print—is the key to success. It’s what turns your new starter kit into a reliable tool for creating professional-quality products from day one.
Why Quality Blanks Make All the Difference
You can have the most advanced t-shirt printing machine starter kit available, but if you're printing on a low-quality t-shirt or blanket, you're undermining its potential. A great machine simply cannot fix a bad blank. For small businesses and makers, the quality of your base product is every bit as important as the hardware you use.
This is where your role expands from printer to textile specialist. Understanding the nuances of fabric composition, weight, and feel is what separates hobbyists from professionals—the businesses that can command premium prices and earn glowing reviews. It's the difference between a one-time sale and a loyal customer.
Material Composition Matters
When it comes to printing methods like sublimation, fabric composition is everything. Sublimation requires a high polyester content for the ink to properly bond with the fabric fibers.
A 100% polyester garment is the ideal substrate for sublimation ink. When heat is applied, the ink transforms into a gas and permanently fuses into the material, creating a vibrant, full-color design with zero texture or "hand." If you attempt to sublimate on cotton or a low-polyester blend, you'll get a faded, washed-out image that looks unprofessional and won't survive the first wash.
This is precisely why we are so selective at Spark Blank Textiles. We don't just sell blanks; we curate and test high-quality textiles specifically for their printability. We ensure every item in our collection is a premium canvas for your creativity.
Understanding Textile Weight and Feel
Beyond material type, the fabric’s weight and construction significantly influence how customers perceive the value of your finished product. This is often measured in GSM (grams per square meter). A higher GSM generally indicates a denser, more substantial fabric.
A thin, low-GSM fleece might be less expensive, but it can feel flimsy and may not hold color with the same richness. A heavier, more luxurious textile, in contrast, provides a superior printing surface and has a more premium feel, justifying a higher price point.
Your choice of blank is a direct reflection of your brand's commitment to quality. Investing in better textiles doesn't just improve your prints; it builds trust with your customers and justifies a higher price point for your finished goods.
We see this in our own curated collection. Our 300 GSM Fleece Sublimation Throws are a customer favorite because they offer an amazing color pop and a buttery-smooth surface—a fantastic all-rounder. But for those wanting something truly top-tier, our 430 GSM Sherpa Throws deliver a much more plush, high-end experience without compromising on print quality.
Spark Blank Textiles Product Suitability Guide
To help you match our premium textiles with the right printing projects, we've put together this quick guide. Choosing the right blank is the first step to achieving a professional, high-quality result that will keep your customers coming back.
| Product | Material & GSM | Best For Printing | Ideal Use Case |
|---|---|---|---|
| Fleece Sublimation Throw | 100% Polyester / 300 GSM | Sublimation, HTV | Vibrant, full-color photo blankets, team logos, promotional gifts. |
| Sherpa Sublimation Throw | 100% Polyester / 430 GSM | Sublimation | High-end, luxury photo gifts, corporate branding, premium home décor. |
| Heavyweight Crewneck | 80/20 Cotton-Poly / 330 GSM | DTG, Screen Printing, HTV | High-end streetwear, brand merchandise, durable and comfortable apparel. |
| Performance Tee | 100% Polyester / 140 GSM | Sublimation, HTV | Athletic wear, team jerseys, event t-shirts needing moisture-wicking properties. |
By focusing on high-quality, tested blanks from the start, you guarantee that every ounce of effort you put into your printing setup shines through in the final product. It’s the secret to turning a simple blank into something brilliant.
Troubleshooting Common Printing Problems
Even with the best t-shirt printing machine starter kit, you'll eventually encounter a few challenges. It’s a normal part of the learning process, so don't get discouraged. Think of these hiccups as valuable lessons on your path to becoming a printing professional. The good news is that most common issues have straightforward solutions.
Let's walk through some of the usual suspects so you can get back to creating fantastic products.
Solving Faded or Blotchy Prints
This is a classic issue, especially for those new to sublimation. You have a beautiful, vibrant design on your screen, but the final print appears dull, washed-out, or splotchy. Nine times out of ten, the culprit is moisture. Fabric naturally absorbs humidity from the air. When you apply heat, that trapped moisture turns to steam and interferes with the ink transfer process.
Fortunately, the fix is simple. Before placing your transfer paper, pre-press your garment for about 5-10 seconds. This quick step evaporates any moisture, flattens the fibers, and creates a perfectly primed surface for printing. It’s a small habit that makes a huge difference in achieving consistently sharp, bright colors.
Why Your Colors Don't Match the Screen
Have you ever printed a perfect navy blue design, only for it to come out looking purple? This frustrating color-matching problem occurs because your screen and your printer use different color models. Screens create color with light using an RGB (Red, Green, Blue) profile. Printers, however, mix physical inks using a CMYK (Cyan, Magenta, Yellow, Black) profile.
The bridge between these two systems is an ICC profile. This is a small data file that translates the RGB colors on your screen into the correct CMYK formula for your printer. These profiles are typically provided by your ink or printer manufacturer. Installing the correct one is essential for achieving accurate and repeatable color.
Pro Tip: Don't trust your on-screen colors without a properly calibrated workflow. Installing the correct ICC profile for your specific printer, ink, and paper combination is the single most important step you can take to ensure what you see is what you get.
Dealing with Peeling Vinyl or Film
If you're using heat transfer vinyl (HTV) or Direct-to-Film (DTF) and your designs start to lift or peel after washing, the issue almost always comes down to three key factors: time, temperature, or pressure. Getting this trifecta right is crucial for a durable, long-lasting bond.
Always start by consulting the manufacturer’s instructions for the specific material you're using, as settings can vary significantly between brands. Ask yourself these questions:
- Is the temperature hot enough? If it’s too low, the adhesive won't fully activate and bond with the fabric.
- Is the pressure firm and even? Inconsistent or light pressure can cause parts of the design to not adhere properly.
- Are you peeling at the right time? Some transfers are "hot peel" (peel immediately), while others are "cold peel" (wait for it to cool). Peeling at the wrong time can ruin the transfer.
A little preventative maintenance can also go a long way. A weekly wipe-down of your heat press platen and a regular nozzle check on your printer can prevent many of these problems before they start, keeping your starter kit running smoothly for years to come.
Turning Your Printing Hobby into a Profitable Business
You've dialed in your process, mastered your equipment, and can produce a perfect print consistently. Now, the real fun begins: transforming that skill into a sustainable business. With your t-shirt printing machine starter kit as your production engine, the next step is to build a solid business framework around it.
This is the point where you shift your focus from craft to strategy, profitability, and scale. It's about understanding your costs, identifying your customers, and making smart decisions that support long-term growth.
Inventory vs. Print-on-Demand: Your First Big Choice
One of the first major decisions you'll face is how to manage your products. Will you purchase blank goods in bulk and hold inventory, or will you adopt a print-on-demand (POD) model and only create products after an order is placed?
The growth of print-on-demand is undeniable. The industry is projected to leap from $12.96 billion to an incredible $102.99 billion, with custom tees representing a massive 35% of those sales. Starter kits are what make this model accessible, allowing you to launch with minimal upfront investment in stock. To learn more, you can read the full research on the custom t-shirt printing market.
Our Take: Holding your own inventory typically leads to better profit margins per item and faster shipping times—a huge advantage for customer satisfaction. However, it requires a larger upfront investment and carries the risk of being left with unsold stock. Print-on-demand is low-risk, but your margins are thinner and fulfillment can take longer.
Many small businesses find success with a hybrid model. Stock your proven best-sellers and core blanks (like the ones we offer) for quick turnaround, but use a POD approach to test new designs or offer a wider variety of custom options without the financial risk.
Getting Your Numbers Right: Costing and Pricing
To run a profitable business, you must know your exact cost-per-print. This goes far beyond the price of the blank garment.
You need to account for every component that goes into a finished product:
- The Blank: The cost of the t-shirt, towel, or blanket you're printing on.
- Consumables: The ink and transfer paper or film used for each specific design.
- Labor: Don't forget to value your time! Assign an hourly rate for your work and factor it in.
- Overhead: A small portion of your shop's rent, electricity, and software subscriptions.
Once you have that total cost, you can set a retail price that covers all expenses and leaves you with a healthy profit margin. A common starting point is to triple your cost-per-print, but it's crucial to research what similar brands are charging to ensure you're positioned correctly in your market.
This is also the time to think beyond individual online sales. Connect with local sports teams, small businesses, and event organizers. Securing bulk orders for corporate merchandise or team apparel can become a reliable source of revenue. Remember, the same starter kit you use for one-off tees can produce high-margin items like premium promotional towels and blankets, allowing you to expand your offerings without needing new equipment.
Ready to expand your product line with blanks that deliver professional results? Spark Blank Textiles offers a curated selection of premium-quality blankets, towels, and more, all tested for exceptional printability. Explore our collection and discover the difference quality makes.


