A Guide to Heat Transfer Printer Paper for Flawless Custom Prints
Ever wondered how those amazing custom t-shirts and personalized blankets get made? Often, the secret ingredient is heat transfer printer paper.
So, what is it exactly? Think of it as a special delivery service for your designs. It’s a specialty paper with a unique coating engineered to pick up ink from your printer and then release it onto fabric when you add heat and pressure. It’s the bridge that takes your digital art and turns it into a wearable, tangible product.
What Is Heat Transfer Paper and How Does It Work?
Imagine you've printed a design. On regular paper, the ink just soaks in and stays put. Heat transfer paper is engineered differently. Its special coating holds the ink on the surface, ready for the next step.
When you bring in a heat press, the magic happens. The heat activates that coating, causing it to release the design and permanently bond it to the fibers of a t-shirt, tote bag, or any other textile. It’s this simple but effective process that has opened up the world of custom printing to everyone from small Etsy shop owners to boutique merchandise creators.
The Core Components of the Process
What makes this paper work so well comes down to its smart, layered construction. It's a system where every part has a job, and getting professional results means understanding how they work together.
The whole process hinges on three key players:
- The Paper: This is the sturdy base, built to handle the journey through your printer and the intense heat of the press without warping or failing.
- The Coating: This is the star of the show. It's a heat-sensitive polymer film that grabs the ink from your printer and then lets go, fusing the design to the fabric.
- The Ink: Your actual design. The ink is carried by the polymer film and becomes a vibrant, durable layer on the final product.
Key Takeaway: You aren't just transferring ink. You're transferring a very thin, ink-infused film that sits on top of the fabric. This is what gives the final print its distinct look and feel.
Why It Matters for Quality Textiles
At Spark Blank Textiles, we're specialists in providing high-quality blank canvases for your creativity. When you're working with premium textiles like our soft fleece or plush sherpa blankets, the last thing you want is a subpar print that compromises the quality of the final product.
That's why heat transfer printing is such a fantastic option. Because the design layer sits on top of the fabric, it produces incredibly bright, opaque colors on a huge variety of textiles, including 100% cotton and polyester blends. This makes it incredibly versatile, whether you're creating promotional golf towels or personalized mink touch blankets for a client.
It’s a straightforward technology that empowers small businesses to offer a diverse range of high-quality custom goods. For those looking to broaden their toolkit, it's also worth learning about laser transfer paper for custom prints, which opens up even more possibilities.
Choosing the Right Paper for Light vs Dark Fabrics
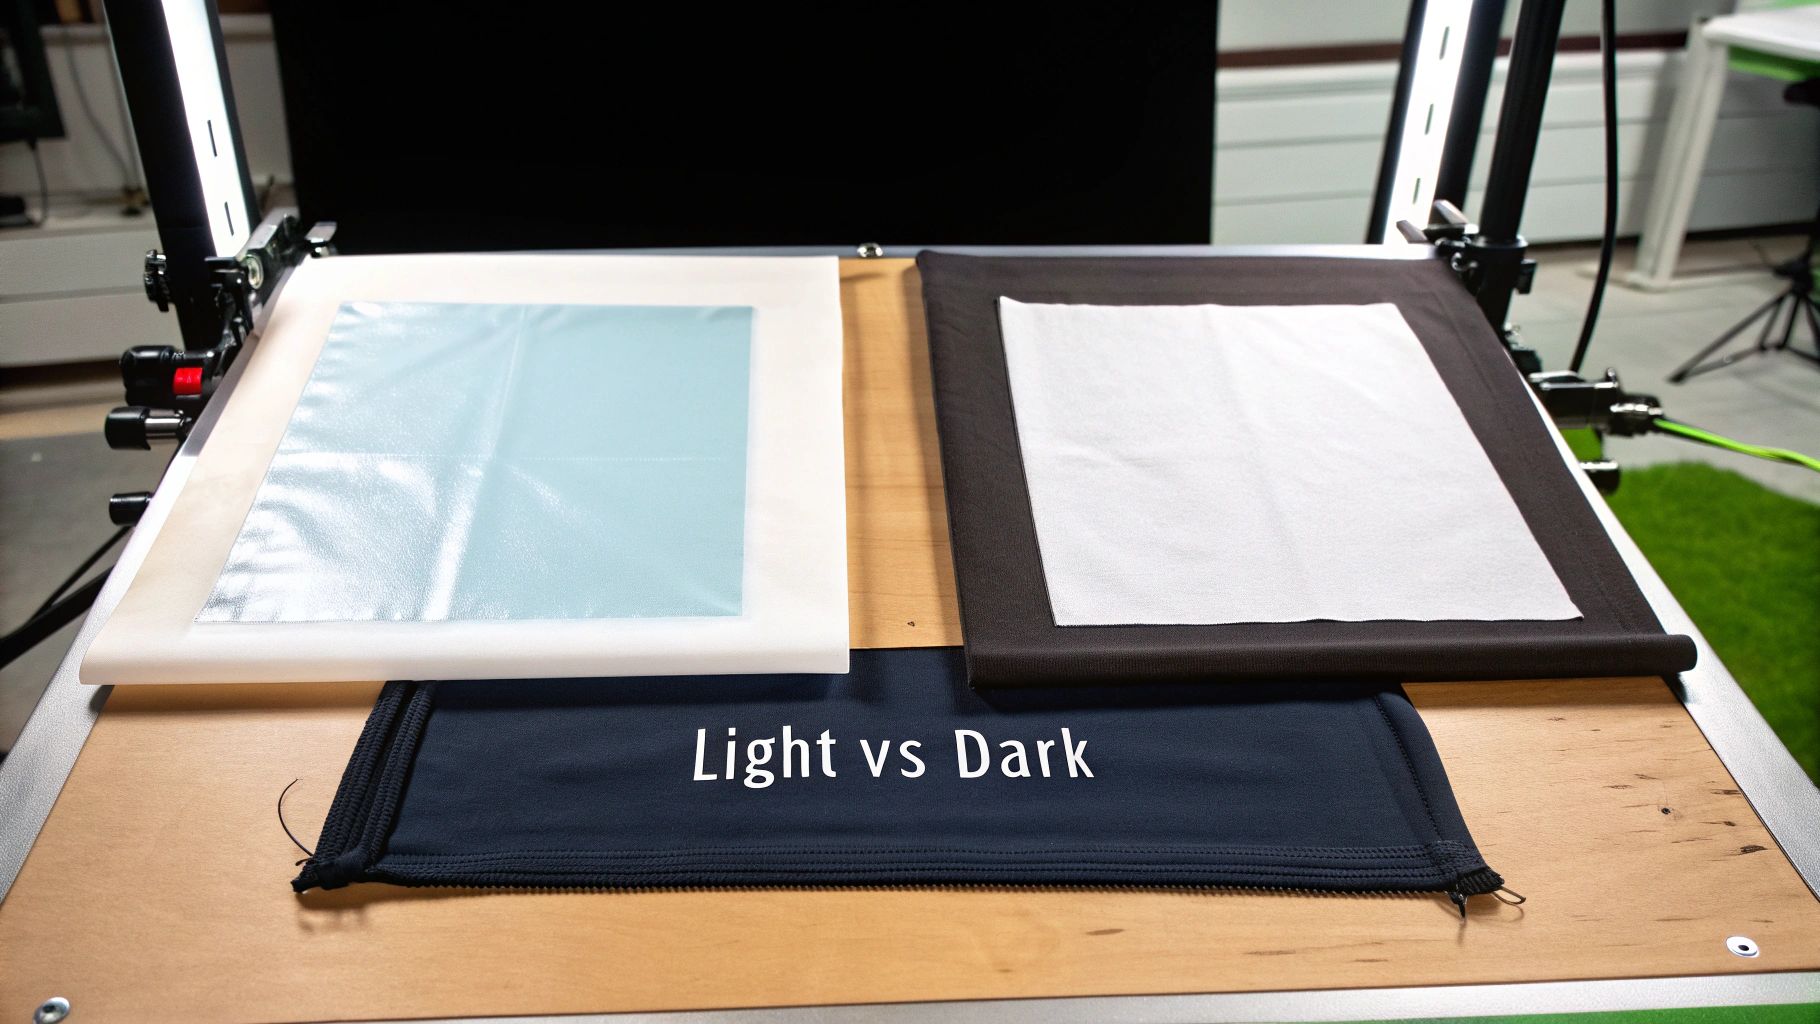
Getting this part right is one of the most important decisions in the heat transfer process. The choice between paper for light or dark fabrics will make or break your final product. Using the wrong one is a fast track to wasted supplies and frustration.
It all boils down to the color of your garment or textile. This isn't just a minor detail—the papers are engineered completely differently to solve two very different problems. Let's look at why you can't just use one for everything.
Paper for Light-Colored Fabrics Explained
Think of heat transfer paper for light fabrics as a transparent window for your ink. The polymer film that carries your design is almost completely clear. This means any part of your transfer that doesn't have ink on it will simply be see-through once it's pressed onto the textile.
This is perfect for white, pastels, or light heather grey fabrics. The paper lets the textile’s own color shine through, effectively becoming the "white" or background of your design.
Because this paper is applied face-down onto the fabric, you absolutely must mirror your image before printing. If you forget this step, all your text and logos will come out backward.
Understanding Paper for Dark-Colored Fabrics
Now, what happens if you try to put that transparent film on a black or navy textile? The colors will get swallowed up by the dark fabric and look dull and muddy. That's where paper for dark fabrics comes in.
This type of paper has an opaque white base layer. It's like putting a coat of white primer on a dark wall before you paint it a bright color. That white base acts as a blank canvas, ensuring your design’s colors pop with full vibrancy, no matter how dark the fabric is underneath.
With this paper, you print your design right-side-up, peel it off the backing, and place it on the garment. This means you do not mirror your image. The trade-off? Any unprinted area of the transfer will show up as a solid white patch. This makes trimming closely around the edges of your design essential for a clean, professional look.
Key Difference: Paper for light fabrics is transparent and lets the textile color show through. Paper for dark fabrics has a solid white base to make colors stand out on dark garments.
A Direct Comparison of Your Options
Putting the two side-by-side really makes the choice clear. Whether you're working on a light-colored picnic blanket or a dark woven tapestry from our Spark Blank Textiles curated collection, picking the right paper is non-negotiable.
Here’s a quick breakdown to help you decide.
| Feature | Paper for Light Fabrics | Paper for Dark Fabrics |
|---|---|---|
| Film Type | Transparent polymer film | Opaque white polymer film |
| Best For | White, pastel, and light-colored textiles | Black, navy, and all dark-colored textiles |
| Image Printing | Mirror image required (applied face-down) | No mirror required (applied face-up) |
| Final Feel | Softer, more integrated feel ("soft hand") | Thicker feel, sits on top of the fabric |
| Trimming | Recommended, but less critical | Essential to avoid a white box effect |
Making the right call here from the get-go saves you time, money, and headaches. It’s the difference between an amateur result and the kind of professional-quality product that keeps customers coming back.
How to Match Your Printer and Ink for Best Results
Great heat transfer paper is essential, but it's only one piece of the puzzle. The final print is only as good as the hardware that created it. That means you need to carefully match your printer and ink to the specific paper you're using. Think of it like a recipe—if one ingredient is off, the whole thing can fall flat.
Your first big decision is choosing between an inkjet or a laser printer. They work in fundamentally different ways and require completely different types of transfer paper. Trying to run inkjet paper through a laser printer (or vice versa) is a recipe for disaster that can result in melted coatings and a potentially damaged machine. Always check the paper’s packaging to make sure it’s made for your type of printer.
The Great Ink Debate: Inkjet Printers
Once you're set on an inkjet printer, the next hurdle is picking the right ink. This is a common challenge for new print shops, and the problem often doesn't show up until after the first wash. Most standard inkjet printers you'd buy for a home office come loaded with dye-based inks. While they're fine for printing photos on paper, they're a poor choice for fabric.
Dye-based inks are water-soluble. That means the moment that t-shirt hits the wash, the design will bleed and fade dramatically. For professional, durable transfers, you absolutely need pigment-based inks.
- Pigment Inks: These inks are made of tiny solid particles of color suspended in a liquid. When heat-pressed, they physically bond with the paper's coating and sit right on top of the fabric. The result is a water-resistant and UV-stable print that can handle being washed.
- Dye Inks: Think of these as colored dyes dissolved in water. They just soak into the fabric fibers and can wash out again, causing fast fading and bleeding.
Expert Tip: Investing in a printer that uses pigment inks from the start, or swapping your standard cartridges for pigment-based ones, is one of the single most important upgrades you can make for your business. It's the key to producing high-quality, long-lasting custom apparel.
Unlocking Vibrancy with Sublimation Ink
If you're working with polyester, there’s another specialized path that delivers absolutely stunning results: sublimation ink. This isn't your standard heat transfer process. When heated, sublimation ink turns from a solid straight into a gas, skipping the liquid stage entirely. This gas then infuses the polyester fibers, permanently dyeing the fabric itself.
This method is the perfect match for the premium textiles we specialize in, like our 100% polyester fleece, sherpa, and mink touch blankets. Since the ink becomes part of the fabric, the design has zero feel (or "hand," as we say in the industry), incredible vibrancy, and durability that's second to none.
The growth in this area is significant; the global heat transfer paper market was valued at USD 523.2 million in 2023, and sublimation was the star, making up 47.2% of the printing segment thanks to its popularity with polyester goods. You can learn more about getting started in our article on dye sublimation kits for small businesses.
Fine-Tuning Your Printer Settings
Finally, don't just hit "print" and hope for the best. Your printer's software settings are a powerful tool. Before sending your design to print on that valuable heat transfer paper, open the settings menu and make these adjustments:
- Paper Type: Don't leave it on "Plain Paper." Change the paper type to "Matte," "Premium Matte," or another photo paper setting. This tells the printer to lay down more ink for deep, saturated colors.
- Print Quality: Always crank this up to the highest setting, usually labeled "High," "Best," or "Photo." It slows the printing down slightly, but the payoff in detail and color depth is well worth it.
- Mirror Image: We've said it before, but it's critical. If you're printing for light-colored fabrics, you must mirror the image. This checkbox is usually located in the printer properties or layout settings.
By taking the time to pair your printer with the right ink and fine-tuning your settings, you build a reliable system that produces consistently beautiful, durable prints your customers will love.
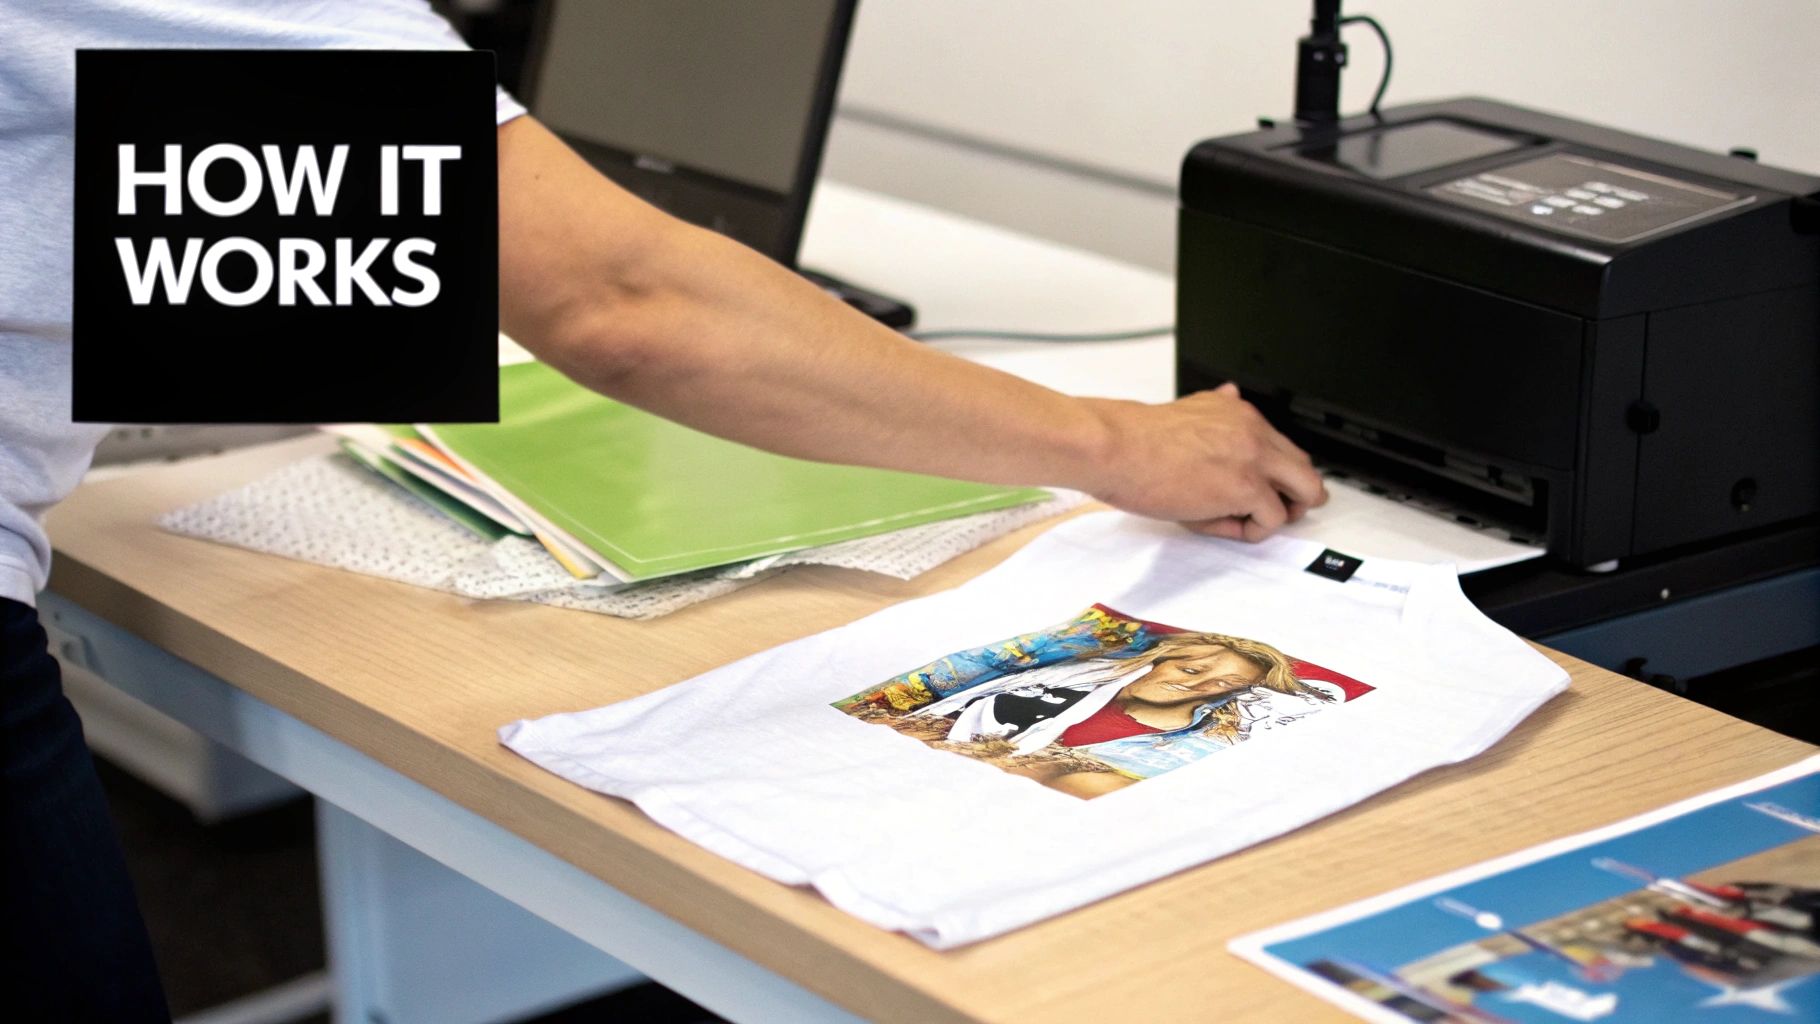
A Step-by-Step Guide to the Perfect Transfer
Alright, you've got the paper, the printer, and the ink sorted out. Now for the satisfying part: putting it all together. This is where we move from theory to a finished product you can be proud to sell. We'll walk through the entire process, from getting your digital file ready to that final, satisfying peel.
Whether you're working with a professional heat press or a home iron, nailing these steps is what separates amateur attempts from sellable, top-quality results. Let's get that design off your screen and onto some fabric.
Step 1: Prep Your Design
Before you hit "print," your artwork needs a little preparation. Getting this right from the start is non-negotiable if you want your final piece to look sharp and professional.
- Resolution is Everything: Start with a high-resolution image, aiming for 300 DPI (dots per inch) at the size you intend to print. If you use a low-resolution file, it will look blurry and pixelated on the fabric, which instantly cheapens an otherwise great product.
- To Mirror or Not to Mirror? This is a classic mistake. If you're using paper for light-colored fabrics, you absolutely must mirror your image horizontally in your software. Think of it like a temporary tattoo; it goes on face-down. For dark fabric paper, you do not mirror the design, since you'll be placing it on the textile face-up.
Step 2: Print It Right
With your artwork prepped, it's time to get it onto the heat transfer paper. This is a simple step, but one where a small mistake can mean wasting a pricey sheet.
First, double-check that you've loaded the paper into your printer correctly. There's a printable side (the coated film) and a backing side (usually marked with a logo or grid). Printing on the back is a frustratingly common mistake. As a pro tip, always set your printer to "Premium Matte" paper and "High Quality" printing. This tells the printer to lay down the perfect amount of ink for rich, vibrant colors.
This little graphic breaks down how the key pieces fit together.
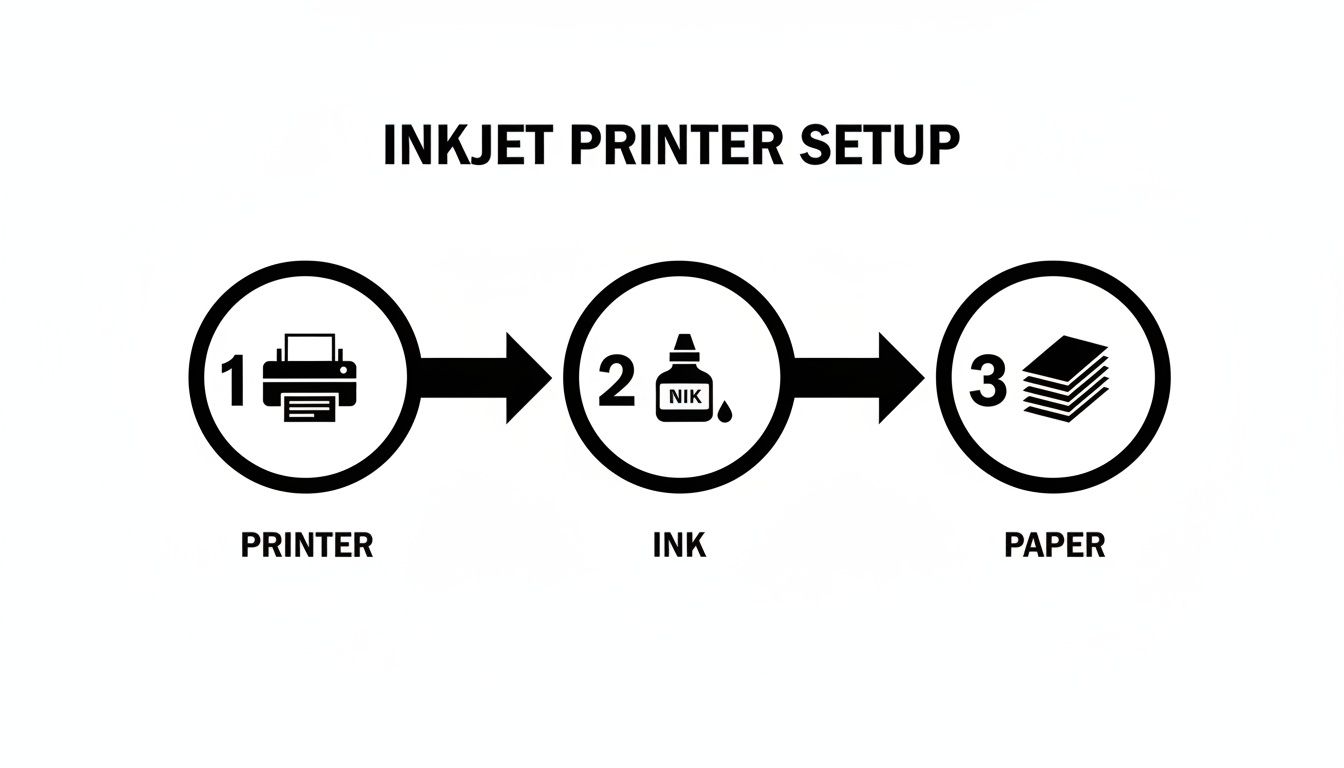
Think of your printer, ink, and paper as three parts of a single system. When they're all working in harmony, you get fantastic transfers.
Step 3: Get Your Textile Ready
You’re close to pressing, but don't jump the gun. Prepping your fabric is a critical step that many people skip. Any textile, whether it’s a fleece blanket or a golf towel, has two enemies hiding in its fibers: wrinkles and moisture.
Lay your item flat on your heat press and give it a quick "pre-press" for about 5-10 seconds. This does two crucial things at once. It irons out any creases that could disrupt your transfer, and more importantly, it steams out any invisible moisture trapped in the fabric. If you don't, that moisture can turn into steam during the actual press and interfere with the transfer's bond, leading to a patchy, uneven result.
Expert Tip for Textured Fabrics: When you're working with something plush like our Sherpa Sublimation Throws, a pre-press is an absolute must. It helps flatten those fluffy fibers just enough to create a smoother surface for the transfer film, which is key to a clean, long-lasting bond.
Step 4: Time to Press
This is the moment of truth. Getting your design placed perfectly is what separates a homemade-looking item from a professional one. We recommend using a T-square ruler to make sure everything is centered and straight. Once you’re happy with the placement, it’s time for heat.
The ideal mix of time, temperature, and pressure depends on your specific paper and the fabric you're using. The best place to start is always with the manufacturer's instructions that came with your paper.
But as a general rule, here are some good starting points:
- Cotton & Cotton Blends: These fabrics can handle the heat. You're typically looking at around 350-375°F (177-190°C) for 15-25 seconds with medium to firm pressure.
- Polyester (like Fleece & Mink Touch): Be more gentle here. Polyester is heat-sensitive, so dial it back to a lower temperature, around 305-320°F (150-160°C), for just 10-15 seconds with medium pressure. This will prevent scorching the delicate fibers.
Step 5: The Peel and Finish
The final step is peeling away the backing paper. Some papers are "hot peel," meaning you remove the backing the second the press opens. Others are "cold peel," where you need to let the item cool down completely first. Peeling at the wrong time can stretch or even rip your design, so always check your paper's instructions.
Once it's peeled, you're done! You’ve created a custom-printed piece. Following these steps methodically is the best way to build your confidence, reduce errors, and consistently create the kind of quality products that will make your small business or Etsy shop shine.
Troubleshooting Common Heat Transfer Problems
Even when you follow every step, things can go wrong. A design that looked perfect on your screen can suddenly peel, crack, or fade the moment it comes off the press. Don't worry, this is a normal part of the learning curve—every professional has a box of misprints they learned from.
Instead of getting frustrated, think of these mistakes as clues. Each problem points directly to a specific snag in your process, and it almost always comes down to time, temperature, or pressure. Let’s walk through the most common headaches with heat transfer paper and how to fix them.
Why Is My Design Cracking or Peeling?
This is, without a doubt, the most common problem. You press what looks like a perfect design, but after a single wash—or sometimes just as it cools—it starts to crack and lift right off the fabric.
Nine times out of ten, the culprit is a weak bond between the transfer film and the fabric's fibers. This weak connection usually boils down to one of these three issues:
- Not Enough Pressure: Your heat press might feel tight, but it needs to be firm. Pressure is what physically forces the melted adhesive deep into the fabric's weave.
- Time or Temp Is Too Low: Heat activates the adhesive, and time gives it a chance to cure and lock in place. If either is too low, you’re peeling the backing off before the transfer has fully bonded.
- Pesky Fabric Coatings: Brand new textiles sometimes have a chemical finish or sizing on them. While a quick pre-press usually burns this off, a stubborn coating can act as a barrier, preventing a solid bond.
The Fix: First, try increasing your pressure. Make it feel a little tougher to lock down. If that doesn't solve it, add an extra 5-10 seconds to your press time. Still no luck? Double-check that your temperature is within the recommended range for the specific paper you're using.
Solving Dull or Faded Colors
You’ve printed a design bursting with vibrant colors, but after pressing, it looks washed out and lifeless on the garment. This problem almost always starts before the heat press is even turned on. The issue is hiding in your printer settings.
Your printer's default "Plain Paper" setting is designed to save ink, which is great for printing a report but terrible for transfers. It lays down a minimal amount of ink, which isn't enough for deep, saturated color.
Pro Tip: Never use the default print settings. Always go into your printer’s properties menu and choose a photo-quality setting like "Premium Matte Paper." Then, crank the print quality up to "High" or "Best." This one simple tweak forces the printer to lay down more ink, giving you the rich, vibrant colors your design deserves.
If your settings are already maxed out, you might be using dye-based inks. Pigment inks are the industry standard for a reason—they naturally produce more vibrant, durable, and fade-resistant results.
How to Deal with Scorch Marks or a Shiny Box
Ever pulled a white textile off the press only to find faint yellowing or a shiny rectangle outlining your design? This is a classic sign of too much heat or pressure. The yellowing means the fabric fibers are starting to scorch, and that shiny box is the impression of the heat press platen itself.
This happens most often with delicate or heat-sensitive fabrics like polyester. While our fleece and sherpa blankets are designed for this process, they still need a lighter touch than a heavyweight cotton tee.
To fix this, start by dropping your temperature by 10-15°F. You can also shave a few seconds off your press time. Another great trick is to place a protective sheet (Teflon or parchment paper) between the platen and the garment. It helps distribute the heat more evenly and acts as a buffer. For stubborn press lines, sliding a heat press pillow inside the garment can soften the platen's edges, making that boxy outline disappear.
Using the right tools is key, and if you're working with intricate designs, you might also be interested in our guide on how to use heat-resistant tape for sublimation to keep everything locked perfectly in place.
Extending the Life of Your Custom Prints
Making a great-looking print is one thing, but making a print that lasts is what builds a brand people trust. You've put in the work to perfect your transfer process, so the last thing you want is for that beautiful design to crack or peel after a few washes.
The secret to longevity isn't complicated—it's all about aftercare. Giving your customers a simple set of care instructions is a small touch that makes a huge difference. It shows you're a professional who cares about quality long after the sale, and it helps your customers keep their custom gear looking fantastic.
Best Practices for Washing and Care
So, what are the biggest enemies of a heat transfer design? High heat and aggressive friction. Most of the damage happens in the washer and dryer, but it’s completely avoidable with a few simple tweaks. We recommend including these tips on a small care card with every order—it’s a professional touch customers really appreciate.
Here are the non-negotiable rules for keeping prints looking new:
- Give It a Day: The transfer needs time to truly "settle in" and bond with the fabric. Always advise customers to wait at least 24 hours before the first wash.
- Turn It Inside Out: If you remember only one thing, make it this. Turning the garment inside out minimizes friction, protecting the design from being scraped by zippers, buttons, or the washing machine drum.
- Go Cold: Hot water is the enemy. It can soften the transfer's adhesive, leading to peeling and cracking. Stick with a cold water wash on a gentle cycle.
- Use Mild Detergent: Harsh detergents, bleach, and fabric softeners can break down the transfer film and fade the colors. A basic, mild detergent is all you need.
Drying Your Custom Textiles
Just as with washing, you need to keep things gentle when it comes to drying. A hot tumble dryer is the fastest way to ruin a perfectly good print.
Expert Tip: The best method is to hang dry. It completely removes heat and tumbling from the equation, giving you the longest possible life for your design. If a machine is the only option, tell customers to use the lowest heat setting—or even better, the no-heat, air-dry cycle.
This advice empowers your customers to take care of their purchases. When you share this knowledge, you're not just selling a product; you're delivering quality and building a reputation for creating high-quality, lasting goods.
Got Questions? We've Got Answers
When you're diving into the world of heat transfer paper, a few questions are bound to pop up. This last section tackles some of the most common ones, giving you quick, practical answers so you can get back to creating.
Can I Just Use Regular Paper for Heat Transfers?
That’s a definite no. Standard office or craft paper won't work. It’s missing the special polymer film that heat transfer paper has, which is the key ingredient that releases the ink onto your fabric when heat and pressure are applied.
Trying it with regular paper will lead to a messy result where the paper bonds to the garment and the ink goes nowhere.
Do I Need to Mirror My Image Before I Print?
Great question, and the answer depends entirely on the type of paper you're using.
-
For light fabrics: Yes, you absolutely must mirror your image. The design is printed and then placed face-down onto the textile, so mirroring ensures it looks correct after you press it.
-
For dark fabrics: Typically, no mirroring is needed. With this paper, you usually print the design, peel it off the backing, and place it face-up on the garment. Always double-check your paper’s instructions, but this is the general rule.
Why Is My Heat Transfer Design Cracking After I Wash It?
This frustrating problem almost always comes down to a weak bond between the transfer and the fabric. The two most common culprits are not enough heat or not enough pressure during the initial application.
It could also happen if the garment is washed too soon after pressing or if it's subjected to harsh detergents or high-heat dryer settings. Sticking to the recommended settings and care instructions for your specific paper is the best way to prevent this.
What’s the Real Difference Between Heat Transfer Paper and Sublimation?
This is a big one. They might seem similar, but they are fundamentally different processes.
The key difference is how the design interacts with the fabric. Heat transfer paper adds a distinct layer on top of the textile, which is why it's so versatile for materials like cotton. Sublimation, on the other hand, is a dyeing process that bonds with polyester fibers.
Heat transfer paper uses a carrier sheet to press a thin, ink-infused layer on top of the fabric. Think of it like a high-tech, durable sticker. This method works on cotton, polyester, blends, and a wide range of colors.
Sublimation, however, is a chemical process. Special ink turns into a gas under heat and permanently dyes the polyester fibers of the fabric. The result is a print you can't feel at all, but it only works on light-colored, high-polyester-count materials.
Ready to turn your creative ideas into high-quality custom products? Spark Blank Textiles provides the premium blankets, towels, and textiles you need to get started. Explore our curated selection and find the perfect canvas for your next project.
Shop our collection of print-ready textiles at SparkBlankTextiles.com


