Large Dye Sublimation Printer: A Guide to Scaling Your Textile Business
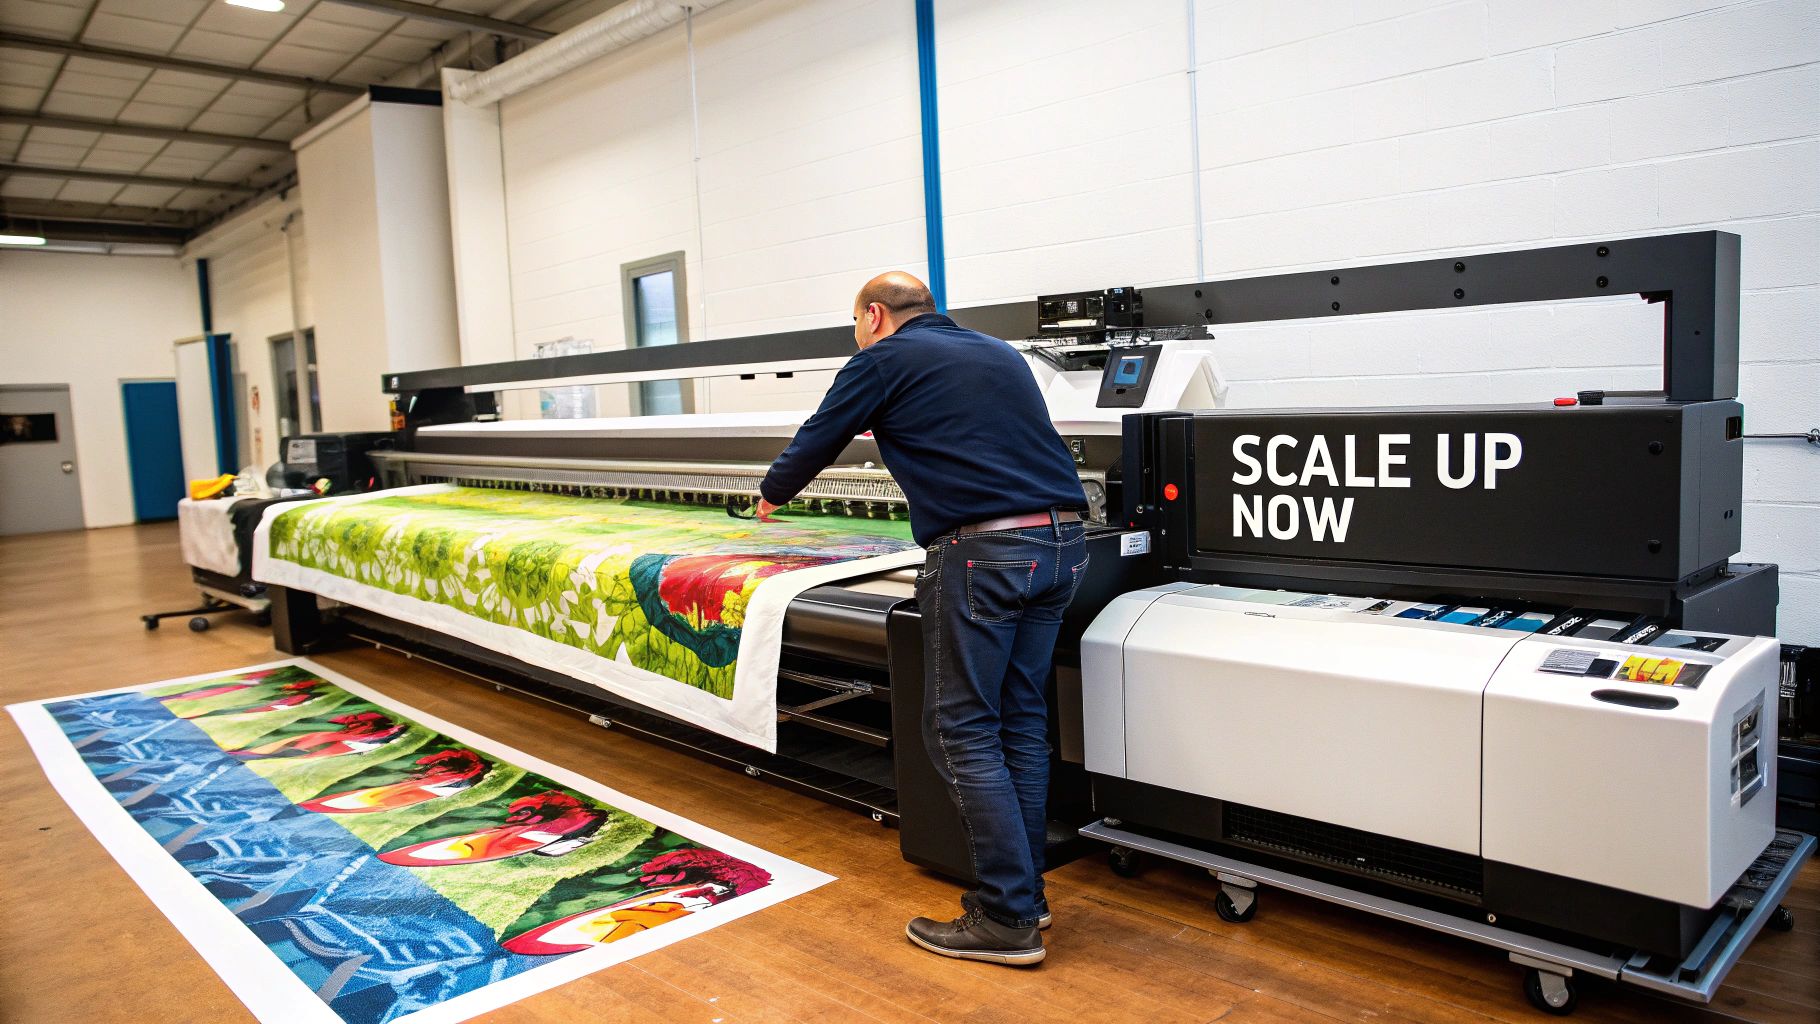
Ever found yourself staring at a desktop printer, knowing your big ideas for custom blankets or full-bleed towels just won't fit? A large dye sublimation printer is the machine that closes that gap, opening the door to bigger products, higher-quality results, and healthier profit margins for your business.
At its core, it’s a professional-grade version of a home printer. But instead of laying ink on top of a surface, it uses special inks that turn into a gas under heat. This process permanently fuses your designs into the fabric fibers, creating incredibly vibrant and durable results that won't crack, peel, or fade over time.
Is It Time to Go Big with Sublimation Printing?
If you're looking to scale your print shop, grow your Etsy business, or expand your promotional products company, making the jump to a large dye sublimation printer is a game-changer. It’s not just about printing bigger images; it’s about fundamentally changing what you can create and how efficiently you can produce it.
Think of it as the difference between making small, one-off custom items and producing large, high-value products that customers are actively seeking, like queen-sized fleece blankets, full-bleed beach towels, or stunning woven tapestries. This leap in capability allows you to work with the premium, large-format textiles that define a professional brand. For makers and small businesses serious about quality, this investment turns a side hustle into a real production powerhouse.
Unlocking New Product Opportunities
The most obvious benefit of upgrading is the immediate ability to offer products that are physically impossible to make with smaller gear. This isn't just a small step up—it unlocks entirely new markets for your business.
- Full-Sized Blankets: Finally, you can print edge-to-edge on our popular fleece, sherpa, and mink touch blankets without size constraints holding you back.
- Custom Towels: Create eye-catching, all-over designs for beach, golf, and bath towels that truly stand out.
- Woven Tapestries: Offer intricate, artistic designs on our heirloom-quality woven tapestry blanks.
- Large-Scale Decor: Produce custom picnic blankets, fabric backdrops for events, and other large textile goods that are always in demand.
This move also positions your business perfectly within a rapidly expanding market. The global dye sublimation printing market recently hit USD 14.9 billion and is on track to reach an estimated USD 28.0 billion by 2030. This incredible growth is fueled by creative entrepreneurs who need to produce personalized, high-quality textiles on a larger scale. You can read more about this industry growth and see exactly how your business fits into this exciting trend.
Choosing Your Path: Direct-to-Fabric vs. Transfer Paper
When you start looking at large-format sublimation printers, you’ll encounter two main technologies: Direct-to-Fabric and Transfer Paper.
Think of it this way: you can either paint a design directly onto a canvas, or you can create a perfect stencil first and then transfer it. Both methods get the job done, but they're built for very different types of projects.
For businesses like yours that focus on creating individual custom products—like our blankets, towels, and tapestries—the transfer paper route is almost always the right choice. It’s the industry standard for a reason.
Why Transfer Printing is the Small Business Sweet Spot
The transfer paper method is a two-step process. First, your printer lays down the design onto a special roll of sublimation paper. Next, you use a large-format heat press to bring that paper and your textile together. The heat and pressure work their magic, turning the solid ink into a gas that permanently fuses into the fabric fibers.
This workflow is a huge win for small print shops and makers. It’s more forgiving; you can spot any print errors on the paper before pressing it onto a premium blanket, which saves a lot of money and frustration.
The real beauty of this method, though, is its versatility. The same large dye sublimation printer and ink setup can handle everything from our plush Sherpa Sublimation Throws to hard-surface items like metal prints or custom mugs (as long as they have the right polymer coating). This flexibility means you can expand your product catalog without buying a whole new printing system.
To get a better handle on the materials involved, you can learn more about choosing the right heat transfer paper for sublimation in our detailed guide.
What About Direct-to-Fabric Printing?
Direct-to-Fabric printing is a different beast entirely. As the name suggests, a specialized printer applies the ink right onto a roll of pre-treated polyester fabric. That fabric then immediately passes through an attached heating unit to cure the ink on the spot.
This method is an industrial workhorse. It’s built for speed and volume—churning out enormous, continuous rolls of printed fabric for things like apparel manufacturing or massive trade show banners.
The Direct-to-Fabric process is truly impressive, but it’s almost always overkill for small businesses. The printers are far more expensive, and the textiles must be specially coated to accept the ink directly, which really limits your material options.
Let's break down the core differences in a simple table.
Direct-to-Fabric vs. Transfer Sublimation at a Glance
| Feature | Direct-to-Fabric Printing | Transfer Paper Printing |
|---|---|---|
| Workflow | One-step: Print directly onto fabric, then heat cure inline. | Two-step: Print on paper, then use a separate heat press to transfer. |
| Best For | High-volume, roll-to-roll production (e.g., fashion textiles, signage). | Individual custom products, hard & soft goods, print-on-demand. |
| Typical Cost | Very high initial investment (industrial-grade machinery). | More accessible entry-point for small businesses and startups. |
For a business focused on creating stunning, one-off finished goods like the ones from Spark Blank Textiles, the transfer paper method hits the perfect balance. It delivers incredible quality and operational flexibility without the industrial-sized price tag.
How to Read a Spec Sheet Like a Pro
A printer's spec sheet can look like a wall of intimidating numbers and acronyms. But once you know what to look for, it tells a clear story about how that machine will perform for your business. Let's translate those technical details into what really matters for creating beautiful custom textiles.
Instead of getting lost in jargon, we're going to zero in on the specs that directly impact the quality and efficiency of printing on large items like blankets and towels. Understanding these key metrics is the difference between buying a printer and investing in the right printer.
This is about giving you the confidence to compare models, see past the marketing hype, and ensure your investment is a perfect fit for bringing your creative vision to life.
Print Width: The Foundation of Your Product Line
This is the most straightforward number on the sheet, but it's arguably the most critical. It simply tells you the maximum width of the material you can print on. If you're focusing on large textiles, this is your starting point.
A 64-inch print width is often considered the sweet spot for a growing sublimation business. That size gives you enough room to print edge-to-edge on a queen-sized blanket (which is usually 60 inches wide). It also lets you "gang up" smaller items, like several beach towels or a run of golf towels, side-by-side. This is huge for maximizing efficiency and getting the most out of every inch of paper.
Key Takeaway: Always choose a print width that’s a little larger than your biggest planned product. This gives you the wiggle room you need for full-bleed designs and cuts down on waste, which directly impacts your profit on every print.
Resolution (DPI): Clarity in Every Fiber
Resolution is measured in Dots Per Inch (DPI), and it dictates the sharpness and detail of your final print. The easiest way to think about it is like the resolution on your TV—more dots mean a crisper, more lifelike image. For textiles, this spec is crucial for capturing the tiny details in complex designs, especially on products like our woven tapestry blanks.
Here's a quick breakdown of what those numbers mean for you:
- 720x720 DPI: This is a great baseline for most textile work. It produces fantastic results for bold graphics and photographic images on fleece blankets.
- 1440x720 DPI or Higher: You'll want this higher resolution for your premium products where detail is everything. It ensures that small text is clean and readable and that intricate patterns stay sharp, delivering the high-end quality your customers will notice.
Print Speed: Finding the Right Balance
Print speed, usually measured in square feet or meters per hour, tells you how quickly the machine can produce prints. And while faster always sounds better, it's really a balancing act. Printing at a machine's absolute top speed almost always means sacrificing resolution.
Most printers have different quality modes: a fast "draft" mode for quick proofs and slower "high-quality" modes for final products. For your day-to-day production on items like our sherpa throws, you’ll probably land on a setting somewhere in the middle that gives you a great mix of speed and vibrant, detailed output. The trick is finding a printer that hits your production targets even when running in its high-quality settings.
The large format printer market is booming, expected to grow from USD 7.94 billion to USD 10.36 billion by 2030. This shows how essential these printers are for businesses making top-tier textiles, which demand high-resolution output for color that pops and lasts. You can find more insights about large format printer market trends on marketsandmarkets.com to see where the industry is headed.
Building Your Complete Sublimation Production System
So, you're ready to invest in a large dye sublimation printer. That's a huge step forward for your business, but let's talk about the bigger picture. The printer, as impressive as it is, is just one part of a larger production workflow.
Think of it this way: a world-class engine is useless without the right transmission, wheels, and chassis. To get those flawless, professional results you're aiming for, you have to think about the entire system, from the moment you hit "print" to the final, finished product. Planning for the whole process right from the start saves you from budget surprises and the headache of realizing you're missing a critical piece of the puzzle.
The Unsung Hero: Your Heat Press
Your large-format heat press is the essential partner to your printer. It's the workhorse that actually brings your vibrant designs to life on the fabric. For big, beautiful items like our plush Sherpa Sublimation Throws, a top-notch press isn't just nice-to-have; it's non-negotiable.
A cheap or unreliable press will sabotage even the most perfectly printed transfer paper. You're looking for a machine that delivers two things with rock-solid consistency:
- Consistent Temperature: The entire heat platen needs to be the same temperature. Any cold spots will leave you with faded, underdeveloped patches in your design.
- Even Pressure: Uniform pressure across the whole surface is the secret to avoiding "ghosting" or blurry edges. This is especially crucial when working with the large surface area of a blanket or towel.
Don't Overlook Your Inks and Paper
Beyond the big machines, the consumables you choose—specifically your sublimation ink and paper—have a massive impact on your final quality. It’s tempting to cut costs here, but it's almost always a mistake. We compete on quality, not on being the cheapest, and your customers will notice the difference.
High-quality transfer paper is engineered to release the maximum amount of ink cleanly during the heating process. Pair that with premium inks, and you get the deep, rich colors that make customers say "wow." Skimping on these will only lead to dull prints, unhappy clients, and a lot of wasted material, completely undercutting the investment you just made in a great printer.
The diagram below maps out the key printer specs we've already covered—width, resolution, and speed—which are the first steps in this whole production chain.
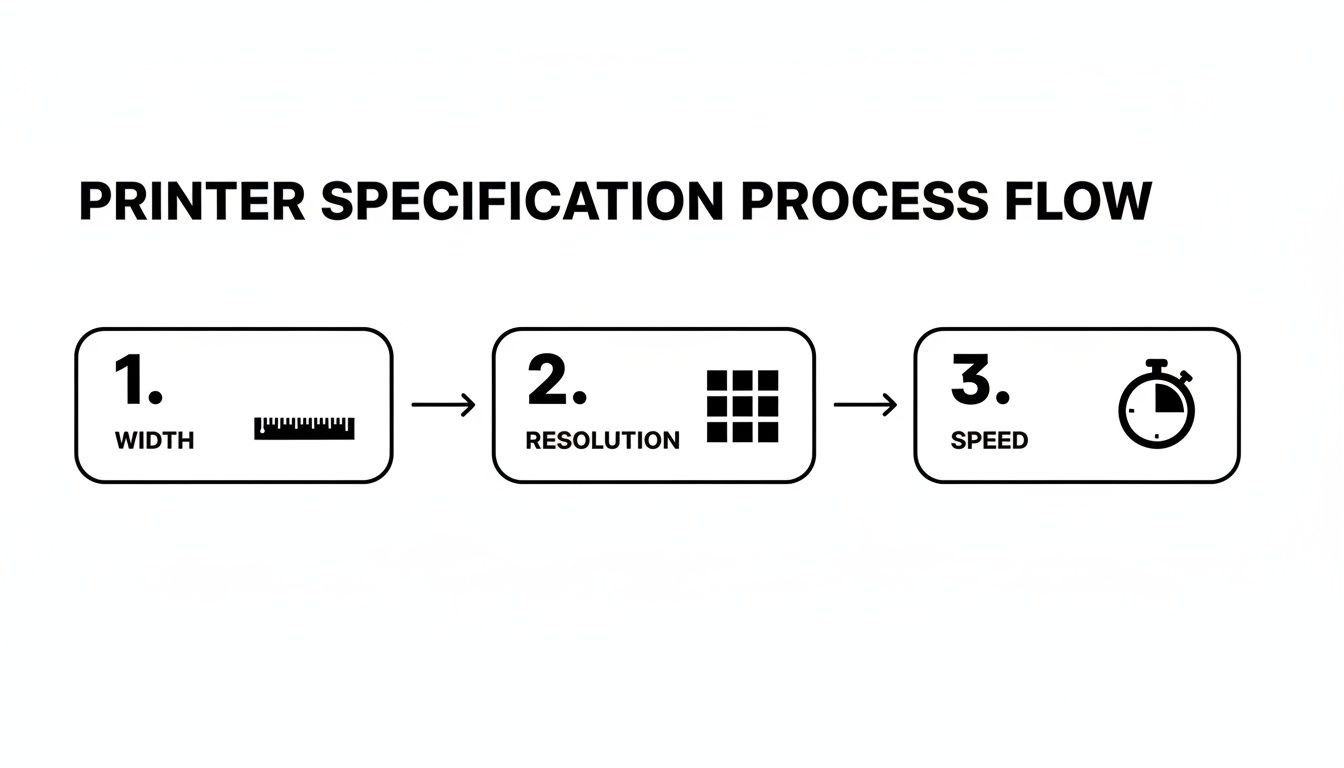
As you can see, each decision you make about your printer directly influences the next stage, from the paper you buy to the settings you use on your heat press.
It's no surprise that more businesses are building out these full-scale systems. The heat transfer dye sublimation printer market was recently valued at US$ 263 million and is expected to climb to US$ 401 million by 2032. That growth is driven by creators and entrepreneurs just like you who are scaling up for high-volume custom work. You can discover more insights about the heat transfer printer market on qyresearch.in to see what's behind the trend.
For a closer look at how all these pieces come together, check out our guide on complete dye sublimation kits for beginners.
Best Practices for Printing on Spark Blank Textiles
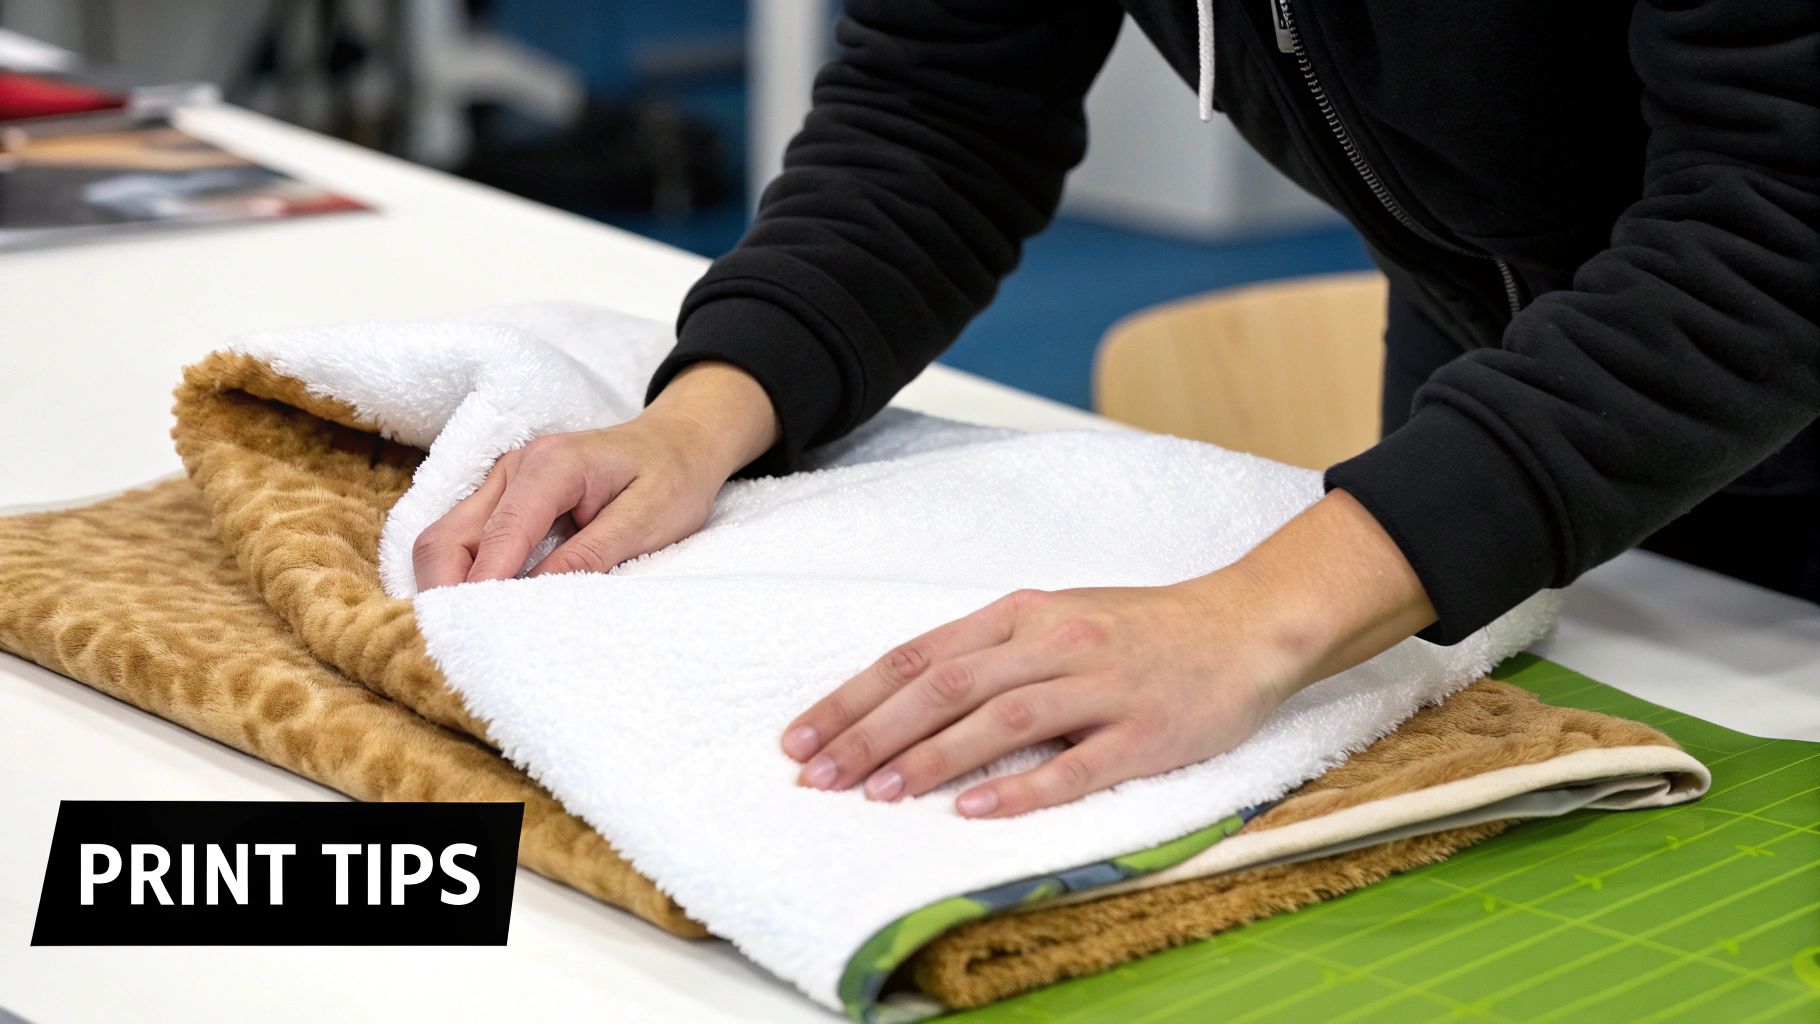
Alright, let's move from theory to the press. Owning a large dye sublimation printer is one thing, but getting flawless results on high-quality fabrics? That comes down to technique and dialing in the right settings for each textile.
Think of us as more than just a supplier; we're your partner in production. As textile specialists, we've spent countless hours in our own shop testing our curated selection of products to find the sweet spots. Our goal is to help you skip the trial-and-error so you can start creating stunning pieces that people will love.
Mastering The Big Three: Time, Temp, and Pressure
The entire game of sublimation boils down to a perfect balance of three key variables: time, temperature, and pressure. When you nail this trio, you get deep, vibrant colors and razor-sharp details. Get it wrong, and you could end up with faded prints or, even worse, a damaged blanket.
Your exact numbers will always shift a bit depending on your specific heat press, the humidity in your shop, and even the design itself. But having a solid starting point is everything. Use our recommendations as your baseline, and don't hesitate to run a few small test presses to fine-tune your process.
Pro Tip: Start a logbook. Seriously. When you press a fleece throw and it comes out perfect, write down the exact time, temperature, and pressure you used. This simple log will become your most valuable asset for getting consistent results every single time.
Recommended Settings for Spark Blank Textiles
This table gives you our go-to starting points for some of our most popular textiles. One crucial first step for any of them: always pre-press the item for 5-10 seconds. This zaps any hidden moisture and smooths out wrinkles, giving you a perfect canvas.
| Product | Temperature Range | Time Range | Pressure | Pro Tip |
|---|---|---|---|---|
| Fleece Throw (300 GSM) | 385-400°F (196-204°C) | 50-60 seconds | Medium | Go over it thoroughly with a lint roller before pressing. This removes any loose fibers for a super crisp final print. |
| Sherpa Throw (430 GSM) | 385-395°F (196-202°C) | 60-70 seconds | Medium-Light | The plush texture can cause press lines. Tucking a foam pillow or pad inside the press helps soften the edges. |
| Woven Tapestry | 390-400°F (199-204°C) | 55-65 seconds | Medium-Firm | The woven texture needs that firm pressure to make sure the ink fully penetrates the fibers for a rich, detailed image. |
| Beach Towel | 380-390°F (193-199°C) | 45-55 seconds | Medium | Always slip a sheet of butcher paper inside the folded towel to stop any ink from bleeding through to the other side. |
After a few presses, you'll get a feel for what works best with your unique setup.
Preventing Common Large Format Issues
Working with big surfaces like blankets brings up a couple of unique challenges you don't usually see with smaller items. Ghosting and press lines are the two usual suspects.
Ghosting is that frustrating faint double image that appears when the transfer paper shifts ever so slightly as you open the heat press. The fix is simple: always secure your paper to the blanket with high-quality thermal tape. To really master this, check out our complete guide on how to use heat-resistant tape for sublimation and make this problem a thing of the past.
Press lines are those annoying indentations your heat press platen can leave along the edges of the fabric. You can get around this by using a sublimation foam pillow or a Teflon pressing pad that’s a bit smaller than your transfer paper. This helps distribute the pressure more gently and eliminates those hard, tell-tale lines.
Calculating Your True Costs and Return on Investment
Alright, let's talk numbers. Buying a large dye sublimation printer is a serious investment, so you need to go into it with your eyes wide open about the real costs involved. The number on the printer’s price tag is just the starting line.
To get a true picture of your investment, you have to look at the total cost of ownership. This means adding up the cost of the printer itself, plus the absolutely essential gear like a large-format heat press, RIP software, and the recurring costs of quality sublimation inks and transfer paper. Tallying everything up front is the only way to avoid surprises down the road.
Projecting Your Profitability
But this is an investment, not just an expense. The exciting part is figuring out your potential return on investment (ROI) and seeing just how fast this machine can start paying for itself. Let's walk through a real-world example to see how the numbers stack up.
Imagine you're printing a batch of 50 custom fleece blankets for a corporate client. Here’s a simple way to break it down:
- Step 1: Figure Out Your Cost Per Blanket. Add up the cost of a single Spark Blank Textiles fleece throw, the ink and paper needed for a full-bleed print, and a little extra to cover your time and electricity.
- Step 2: Set Your Selling Price. Look at what similar high-quality, personalized blankets are selling for. You want to be competitive, but don't undervalue the quality of your work!
- Step 3: Calculate Your Profit Margin. This is the easy part: subtract your cost from your selling price. That's your profit on one blanket.
Let's say your total cost to produce one blanket is $25. You decide to sell it for $65, a standard market rate for a premium custom product. That leaves you with a $40 profit on every single blanket.
Now, multiply that by the batch size. Selling just 50 of those blankets nets you a $2,000 profit.
Running these simple numbers makes the path to profitability incredibly clear. It helps you calculate exactly how many jobs you need to land to cover your initial equipment costs and start turning your new printer into a serious money-maker for your business.
Got Questions? We've Got Answers.
Diving into the world of large-format dye sublimation can feel a bit overwhelming at first. We get it. We talk to businesses every day that are making this exact leap, and we've heard just about every question in the book. Here are the straight-up answers to the ones that come up most often.
What's the Single Biggest Mistake People Make?
Hands down, the most common pitfall is focusing only on the printer's price tag. People forget that the printer is only half the equation. You absolutely need a heat press that matches your printer's size, and that piece of equipment can easily be just as expensive and take up a massive amount of floor space and power.
Always think in terms of the entire system. Factor in the printer, the heat press, the software, and your initial stock of ink and paper. That's the only way to get a true picture of your startup costs and avoid painful surprises down the road.
Think of it this way: the heat press isn't an accessory. It's the other essential half of your production line. If your press is smaller than your printer, you've created an instant bottleneck and limited what you can produce from day one.
How Much Maintenance Are We Really Talking About?
Like any serious piece of machinery, a little regular attention goes a long way. You're not looking at hours of work, but you do need to be consistent. Most of the time, this just means running daily or weekly head cleanings—many of which are automated—and giving the machine a quick wipe-down to keep dust out.
It might sound like a hassle, but it's really not. Most manufacturers provide a simple checklist to follow. Honestly, spending just 10-15 minutes a day on a basic care routine is all it takes to keep your printer in top shape and avoid the kind of clogs that lead to expensive service calls.
Can I Use This Printer on More Than Just Fabric?
Absolutely! That's one of the best parts. While a large dye sublimation printer is a rockstar on polyester fabrics (like our blankets and towels), its versatility is a huge advantage. The exact same process works like a charm on any hard-surface item that has a special polymer coating.
This means you can easily branch out and create all sorts of other high-margin products. Think about things like:
- Custom photo mugs and tumblers
- Stunning metal prints for wall art
- Personalized phone cases
- Custom-printed ceramic tiles
This flexibility turns your printer into a gateway for multiple new revenue streams, well beyond just textiles.
Ready to turn those big ideas into brilliant, tangible products? Spark Blank Textiles provides the premium, print-ready blankets, towels, and tapestries you need to get the absolute most out of your new setup. With fast, 2-3 day US shipping, you can get the quality blanks you need, when you need them. Explore our collection and see what you can create.


